Last updated on September 28th, 2022 at 09:34 am
This blog post was originally published in early 2017, but since then newer versions of SQL Server were released, so I thought that it was time for an update. Here I’ll show you, step-by-step, how to create a SQL Server computer account login, how to grant SQL Server System Admin (SA) rights to the account and how to test the connection between the SQL Server and the computer account.
It is not always obvious how to add a SQL Server computer account login or how to grant SQL Server SA rights within SQL Server, but these are requirements when the SQL Server is remote to the primary System Center Configuration Manager (SCCM) site server or the CAS server.
As a prerequisite, you need to have SQL Server Management Studio (SSMS) installed, so before you get started, remember that in SQL Server 2012 and later, SSMS is NOT included with the ISO media. You may need to add an extra step here in order to download and install SSMS first. Keep in mind that you will need to install SSMS either on your workstation or on the server that hosts the SQL Server. For more information about how to install SSMS, please see my blog post entitled, “Where is SQL Server Management Studio (SSMS)?” That post will give you step-by-step instructions on how to install SSMS. Once SSMS is installed, you can then continue along with the rest of this blog post.
Create a SQL Server Computer Account Login
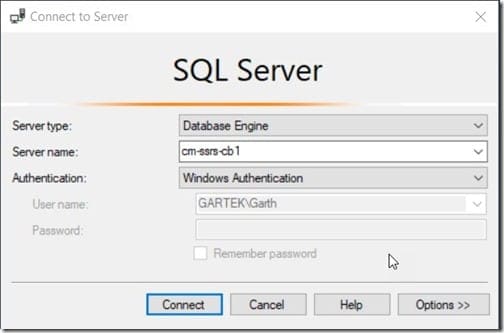
Start by opening SQL Server Management Studio (SSMS) and connecting to the SQL Server. In my case, I’ll be connecting to cm-ssrs-cb1.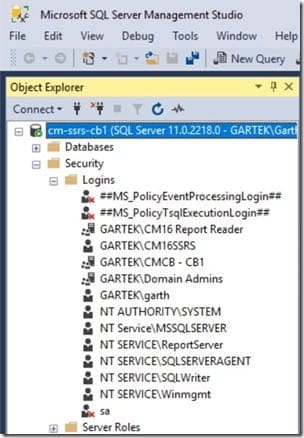
In the Object Explorer window, expand the Security | Logins nodes.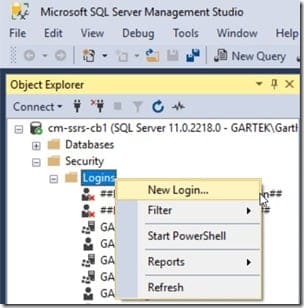
Right-click on the Logins node and then click on New Login…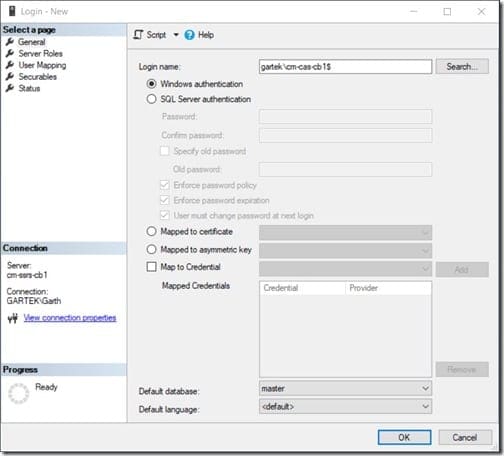
Note: Do NOT click on the OK button until after the next step.
In the Login name text box type:
<domain name>\<computer name>$
It is important to include the dollar $ sign because if you don’t, the login name will be treated as a user account and not as the computer account.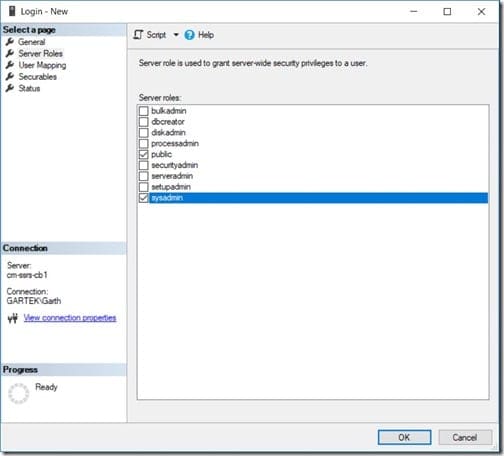
Select the Service Roles node and then check the sysadmin checkbox. Finally, click on the OK button in order to close the window.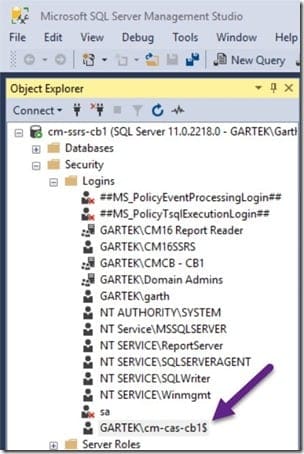
With that last step completed, the SCCM site server computer account will be able to login immediately with SA rights.
Testing the Connection to the SQL Server Using the Computer Account
Now that you finished adding the computer account to the SQL Server, how do you test it in order to confirm that everything is working correctly? Simply use the local system account, run SSMS and see if you can connect to the server. Once connected, query the database to prove that you have SA rights. I’ll go into more detail about how to do this, so keep reading!
There are many different ways to run a local system account, but the easiest way is to use PsExec.
Open an elevated CMD prompt. Change the directory to PsExec. In my case PsExec is within the system path. Run the command:
psexec -s -i cmd
This command will open another CMD window. In the new window run the whoami command. This should show you that you have a CMD prompt running at nt authority\system. In other words, this is the local system account.
Change the directory to where SSMS is located and run SSMS.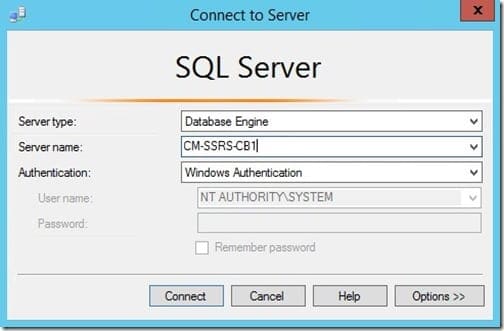
Be patient. SSMS might take a little while to load the first time, but please wait for it. In the Server name box, type the name of your SQL Server. In my case it is CM-SSRS-CB1. Notice that the User name is shown as NT AUTHORITY\SYSTEM. Click on the Connect button in order to continue.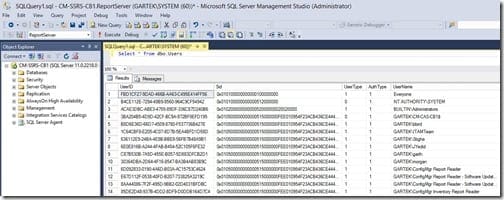
At this point it really doesn’t matter what you query as long as it proves that you have access. In the screenshot above you can see that I ran a query to show all SSRS users. This should be more than enough to prove that everything working as expected.
If you have any questions about how to create a SQL Server computer account login, please feel free to contact me @GarthMJ.
