Last updated on August 6th, 2022 at 03:58 pm
By now you have read in my blog post set about why HTTPS and Content Delivery Network (CDN) are important for websites. I’ve also discussed the importance of cookie free domains and showed you how I tested the performance of my website, how to order an SSL certificate, and how to set-up Amazon CloudFront CDN. This blog post will show you how to complete the process of installing W3 Total Cache and Amazon CloudFront on WordPress.
As mentioned, I’ll show you how to install and configure the W3 Total Cache plugin, but I’ll get to that later in the post.
Remember, in the previous post, I asked you to note a few items: Access key ID, Secret access key, and CloudFront host name/your CNAME. You will need this information later on, so make sure that you have it handy.
Amazon Certificate
I’ll be using an SSL certificate for my website and I’ll also need a certificate for my CDN site. This means that I will need to order a free certificate from Amazon to use with my CloudFront CDN site. For more details about SSL certificates, please see my blog post on the subject.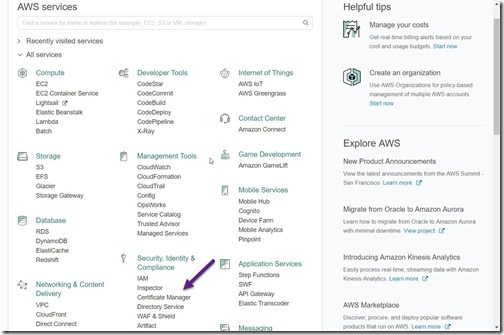
Start by locating Certificate Manager on Amazon Web Services (AWS).
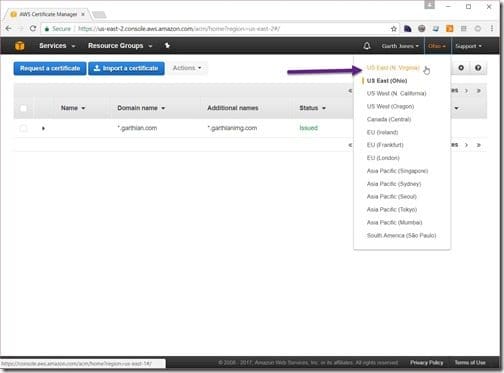
It may sound odd if you don’t live in the Eastern United States, but make sure that you select US EAST (N. Virginia) (see the purple arrow). Otherwise the Amazon certificates will NOT work with CloudFront. Next click on Request a certificate.
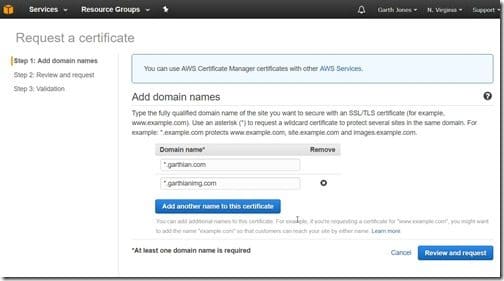
Enter the name of your domain within the Domain name text box. If you need multiple domain addresses, click on the Add another name to this certificate button to expose another Domain name text box. Finally click on the Review and request button.
Tip
If you are using CNAME for your CDN content, you will need to request a wildcard certificate. Amazon will send an email to the webmaster of the domain, which in my case would be webmaster@cdn.gathian.com, BUT there is no mail server for cdn.garthian.com. Instead I requested a wildcard certificate for *.garthian.com, so that the email would go to the correct email address.
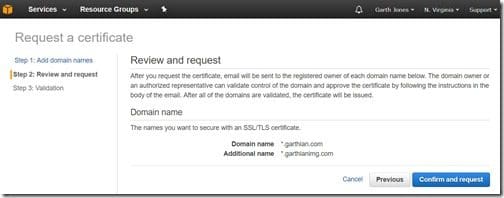
Click on the Confirm and request button to continue.
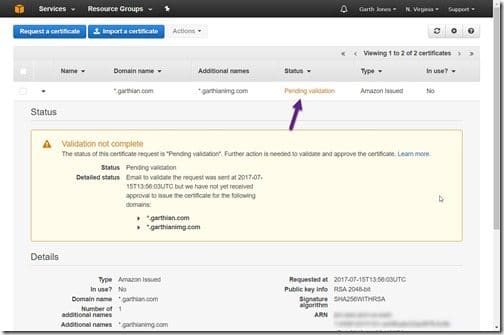
You are returned to Certificate Manager where you’ll notice that the certificate is Pending validation.
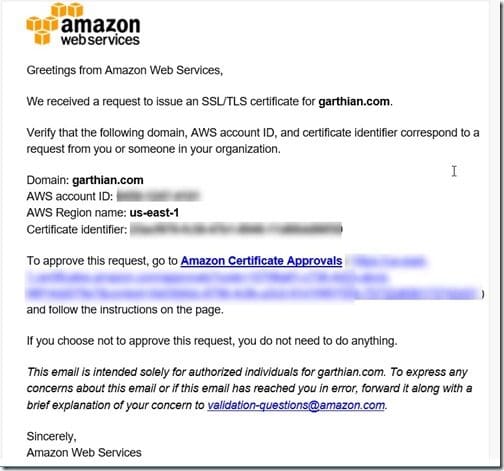
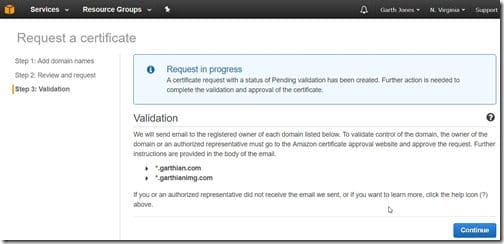
Within seconds you should receive an email asking you to validate the ownership of the domain. Click on the Amazon Certificate Approvals link.
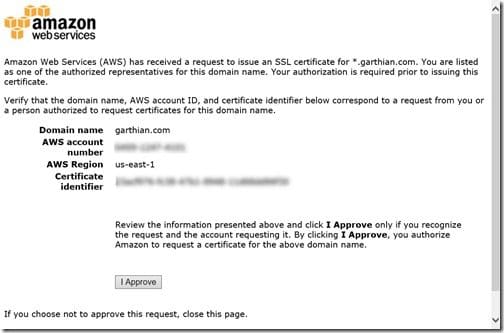
On the approval page, click on the I Approve button.
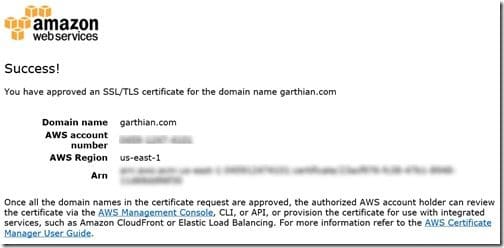
After clicking on the I Approve button, you will receive a success notice.
Keep in mind that you will be required to approve all domains on the certificate. In my case since I requested wild cards for both garthian.com and garthianimg.com, I will need to validate both domains.
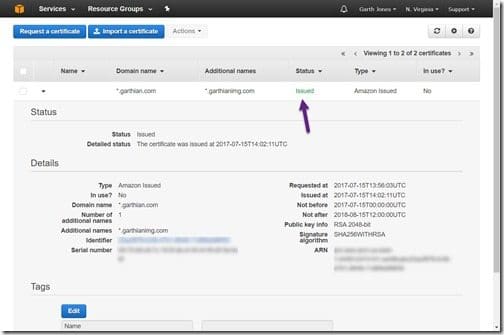
Turning back to Certificate Manager, you’ll notice that the certificate was issued.
Editing the Distribution Setting
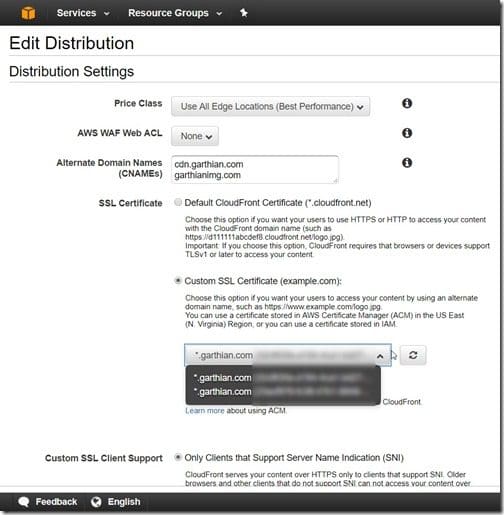
In the above screenshot, you can see that I selected Custom SSL Certificate. My certificate is listed within the drop-down box. Once the SSL certificate is applied by clicking on the Yes, edit button the Amazon tasks are finished. Now it’s time to move onto WordPress.
Note: I have two Amazon certificates listed in the above screenshot because I created one when I setup CDN for the first time and a second one when I documented the steps for this blog post. You will most likely only have one certificate.
Installing W3 Total Cache on a WordPress Site
In this section, I’ll show you how to install W3 Total Cache on WordPress. This plugin is used to help with leveraging CDN on WordPress.
Start by logging-on to your WordPress site. Locate the Plugins node, click on Add New, and then search for W3 Total Cache.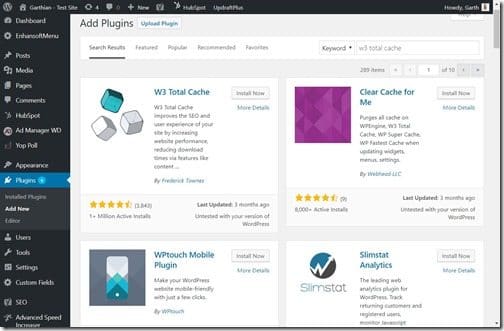
Click on the Install Now button. Note: the installation process will take a few minutes to complete.
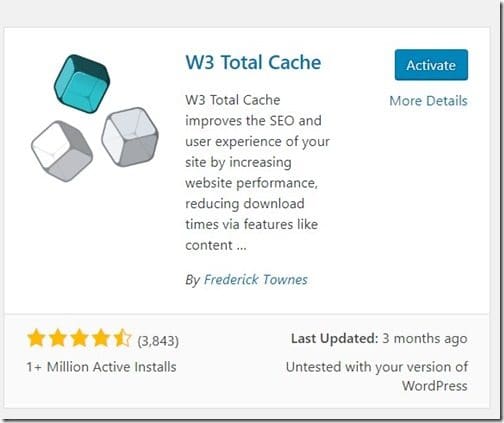
Once the installation is done, click on the Activate button.
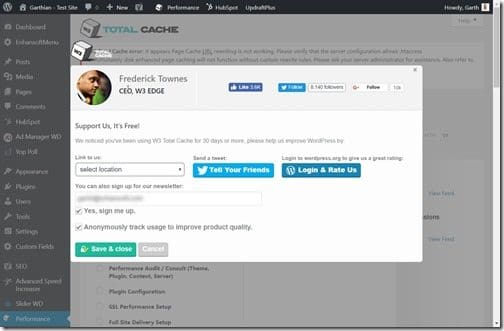
On the left-hand side of your screen, in the menu, click on the Performance node. Click on Cancel to exit the pop-up window.
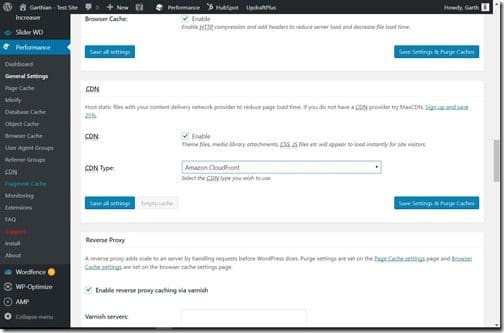
Click on the General Settings node and scroll down to the CDN section. Select the Enable check box and then select Amazon CloudFront under CDN Type. Finally click on the Save Settings & Purge Caches button.
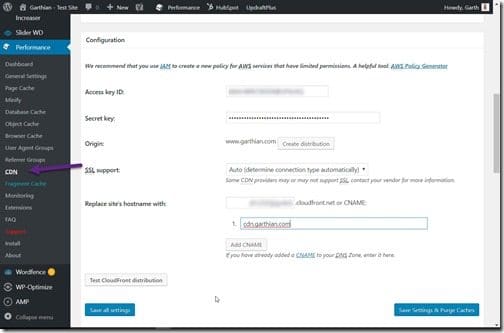
On the left-hand side of the screen select CDN (purple arrow) in the menu under the Performance (W3 Total Cache) node. Scroll down to the Configuration section. Using the details that you noted within the previous blog post, enter your Access key ID, Secret access key, and CloudFront host name/your CNAME, if you created one. In the example above, I entered my CNAME cdn.garthian.com.
Finally click on the Save all settings button.
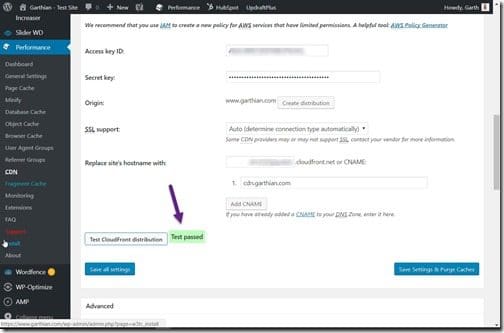
To ensure that everything is working correctly, click on the Test CloudFront distribution button. Wait for the results to say, Test passed, and then click on the Save Settings & Purge Caches button.
Your site is now using a CloudFront CDN!
Summary
In my next blog post, I will talk about how using a CloudFront CDN affected performance and what I learned from this experience.
Finally, don’t forget that you can subscribe to my RRS feed to stay on top of the latest trips and tricks. If you have any questions, please feel free to contact me @GarthMJ.

