Last updated on April 27th, 2024 at 10:09 am
Are you having trouble finding information about how to leverage Microsoft Intune data in a Power BI report? You’re not alone. Everywhere I looked for these reporting details, I either couldn’t find anything or the information was incomplete. In some cases, the instructions were missing steps or the author assumed that you knew exactly what you were doing. In order to change this, I put together this step-by-step blog post to show you how to write a basic report in Power BI by leveraging Microsoft Intune data.
Prerequisites
I have to make a few assumptions about your environment:
- Microsoft Intune is setup.
- You can access Microsoft Intune.
- The Intune Data Warehouse is enabled.
- Power BI is installed on your desktop. If it isn’t, please see this blog post, How to Install Power BI Desktop, for more details.
The OData Connection String
In order to access reporting information from Microsoft Intune, you need the OData connection string. The following steps will help you find the URL.
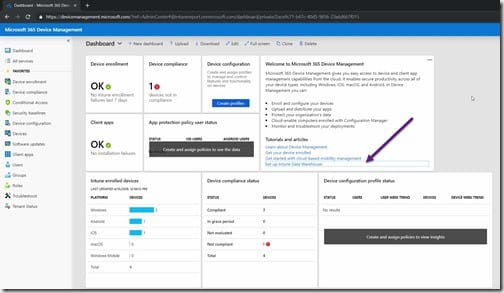
Logon to your Microsoft Intune tenant. On the Dashboard node, select the Set up Intune Data Warehouse article under Tutorials and articles (purple arrow).
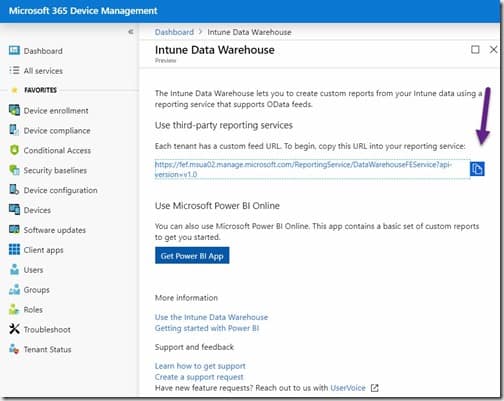
Copy the custom feed URL. This is your OData connection string/feed for the Intune Data Warehouse. Wasn’t that easy? You are now finished with the Microsoft Intune website, so you can close the browser.
By the way, my URL looks like this: https://fef.msua02.manage.microsoft.com/ReportingService/DataWarehouseFEService?api-version=v1.0
Importing Data from the Intune Data Warehouse to Power BI
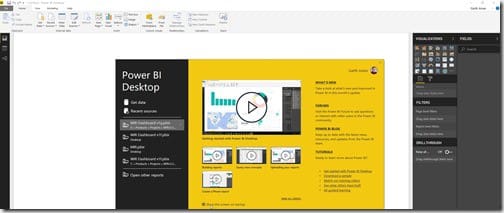
Start Power BI desktop. Since this is a new report, I clicked on the Get data link on the pop-up page. If you are not creating a new report, then click on the Get Data link in the ribbon bar.
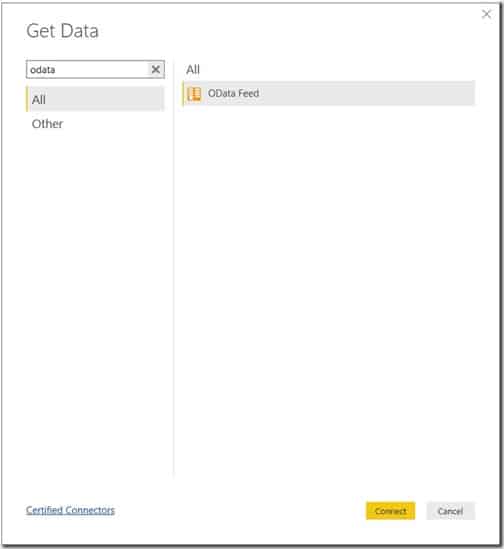
In the search window, type odata. Next, select OData Feed before clicking on the Connect button.

In the OData feed pop-up window, paste the Intune Data Warehouse OData URL. Then click OK.
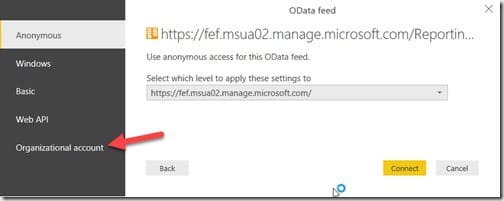
If you are already connected to the OData URL, you won’t see this login screen, so you can skip down to the Navigator window step below. However, if this is the first time you are using the OData URL, then when you see this screen simply click on the Organizational account node.
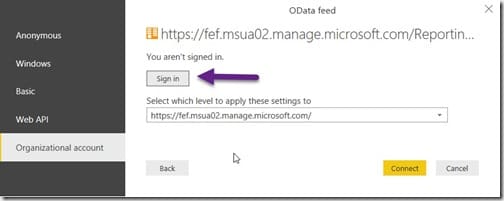
Click on the Sign in button.
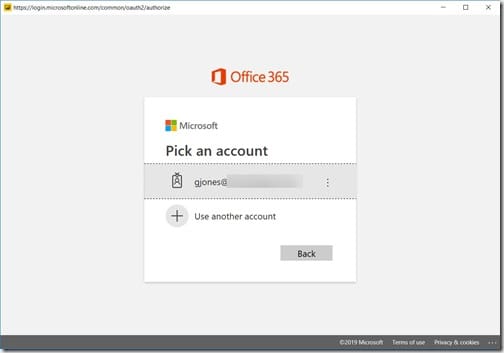
Select your account.
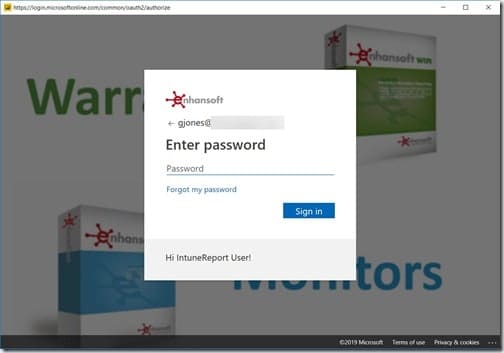
Enter your password and then click Sign in. By the way, I know that I am signing in to the correct account because I can see the “official” Enhansoft background.
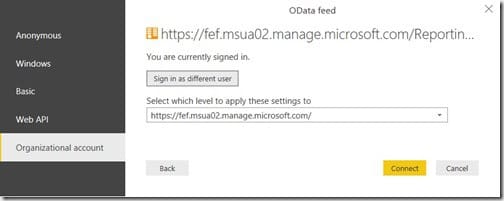
Click on the Connect button.
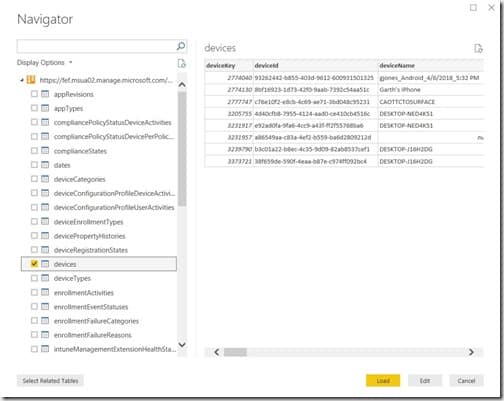
At this point, the Navigator window pops-up. It displays all of the available data from the Intune Data Warehouse.
In this example, I selected the devices table. After a few seconds, I saw a preview of the data for devices. Next, I selected deviceTypes, ownerTypes and users.
After you select the data you want in your report, click on the Load button. Your data is now loading into Power BI. Depending on the amount of data, this process may take a minute or two.
Creating a Power BI Report
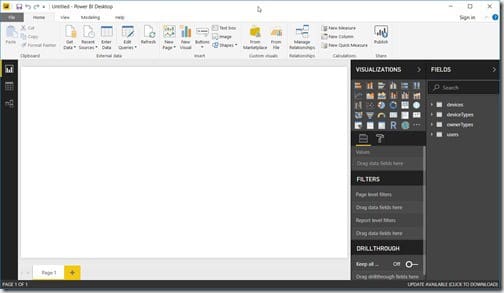
Once the data is loaded into Power BI, you are presented with a blank report. The first thing that I did was expand the devices table on the right-hand side of the screen.
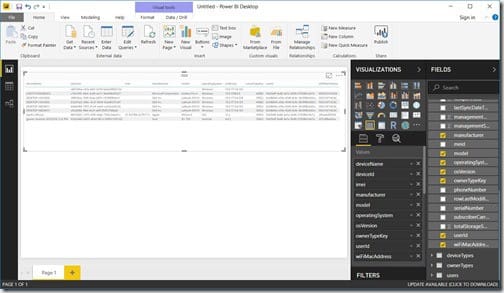
Next, I selected the deviceId, deviceName, imei, manufacturer, model, operatingSystem, osVersion, ownerTypeKey, userId, and wiFiMacAddress fields.
Selecting the fields automatically creates a table with the results in one report. Isn’t that handy? By the way, you can select any of the fields from any of the tables you imported from Microsoft Intune. You’re not restricted to selecting fields from only one table.
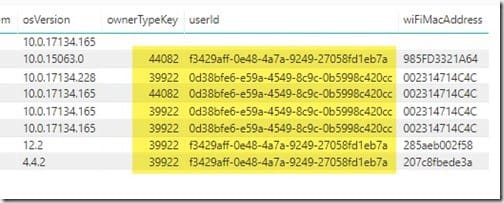
Further, make sure to review the results that you get.
In this example, I paid particular attention to the ownerTypeKey and the userId columns. They were not particularly helpful, so I’ll show you how I changed that.
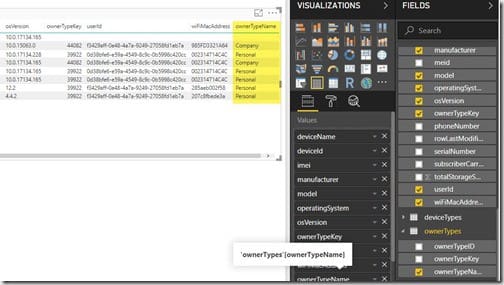
I expanded the ownerTypes table and dragged the ownerTypeName column to the end of my report’s table. Simply by adding this column, you can now see clearly whether or not the device is owned by the company or if it is a personal device. Isn’t that a lot easier to understand? Since it is, I de-selected the ownerTypeKey field from the device table.
Once you’re finished selecting the data fields, you might want to change the order of the columns in your report. In that case, all you need to do is move the data fields around under the Values heading.
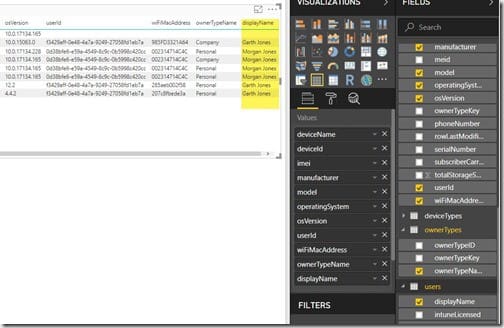
Next, I wanted to know who owns each device, so I expanded the users table and dragged displayName to my report’s table. The addition of this column made the report, again, a lot easier to understand, so I removed the userId column from my report’s table by de-selecting the field.

Here’s what my basic Power BI report looked like when I was done.
Basically, what more would you like to know about Power BI reports and Microsoft Intune data? Tell me, and also if you have any questions about this post, please feel free to contact me at @GarthMJ.
