Last updated on December 22nd, 2023 at 12:27 pm
Where to start with this article. As a Microsoft Configuration Manager (SCCM / ConfigMgr / MCM) administrator we wear many hats. Working with Certificates is just one of the hats! We all know that we can make our environment more secure by leveraging Certs for things like Power Shell and IIS. This article will answer the question How to Create a Code Signing Certificate. Then it will show you how to request/enroll a user account to have the certificate.
This article assume that you have ready install Active Directory Certificate Server ADCS, if you have not done this step, make sure that you see How to Install AD Certificate Services and How to Configure AD Certificate Services
Creating a Code Signing Certificate Template
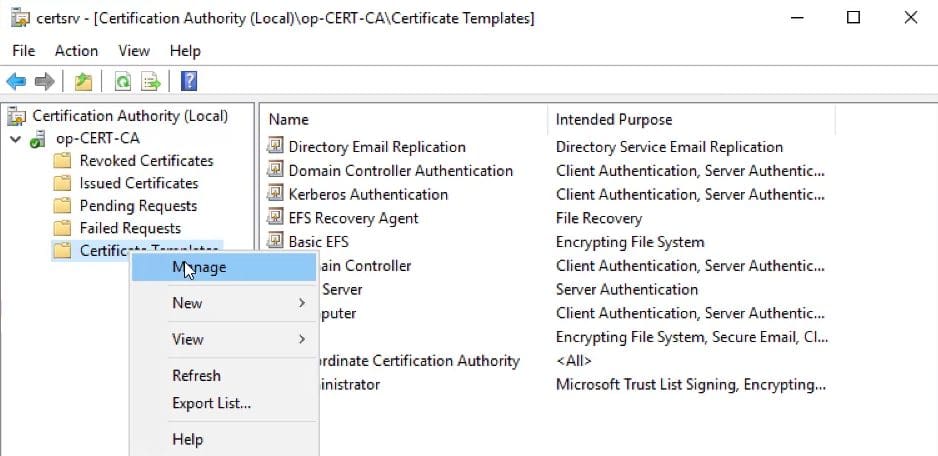
Starting on your certificate server, Launch the Certificate Authority. Expand your certificate Server (op-cert-CA) then right-click Certificate Template node. In the popup menu select Manage.
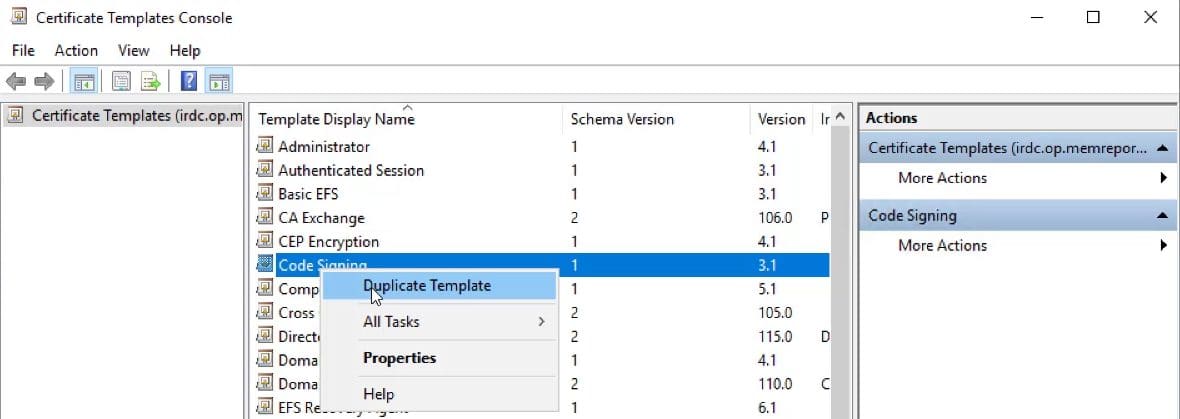
In the Certificate Template Console, locate the Code Signing template. Right-click and select Duplicate Template menu item.
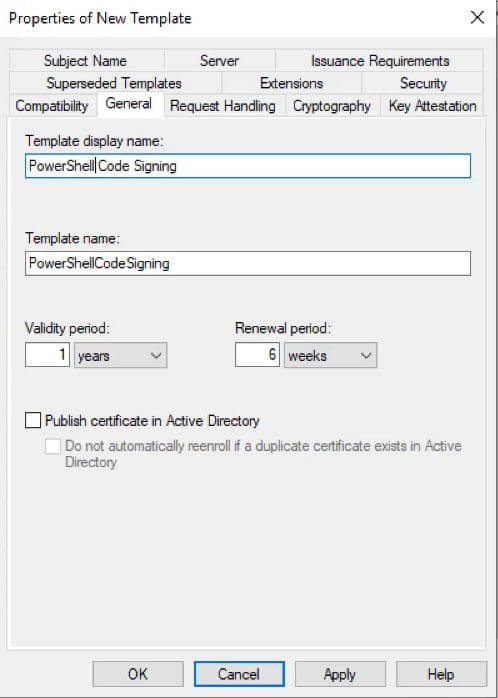
On the General tab, Change the Template display name to something more appropriate. I used PowerShell Code Signing. I left all other field to their defaults.
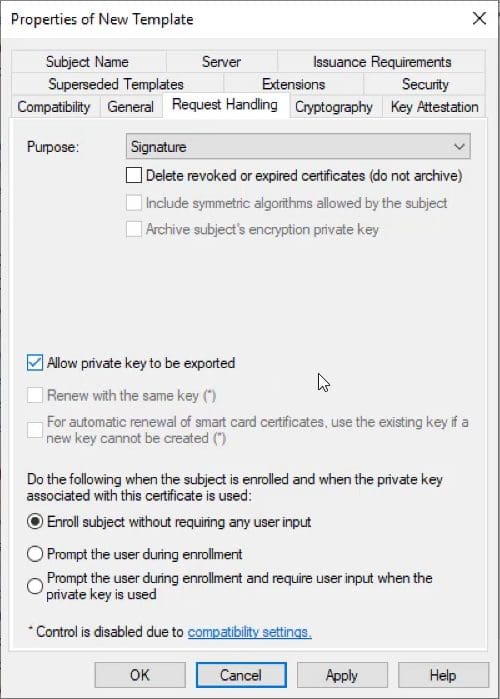
Next on the Request Handling tab, Select Allow Private key to be exported.
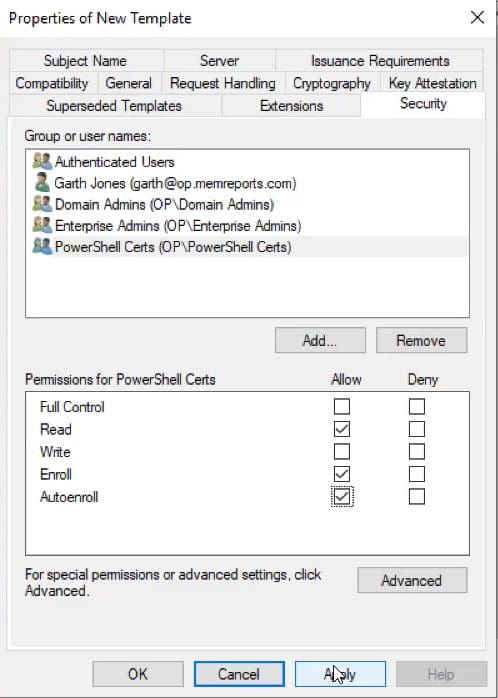
On the Security tab add the appropriate AD Security group, Grant(allow) this group both the Enroll and Autoenroll rights.
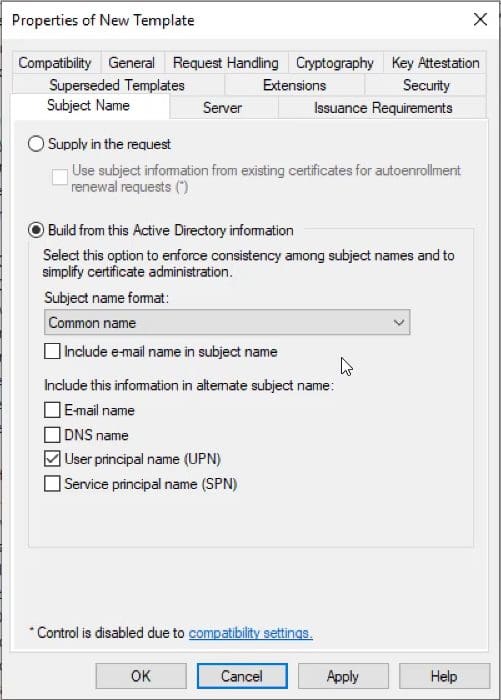
Next on the Subject Name tab, change the subject name format to use the Common Name. Additionally ensure that the User principal name (UPN) is selected.
Issue a Code Signing Certificate Template
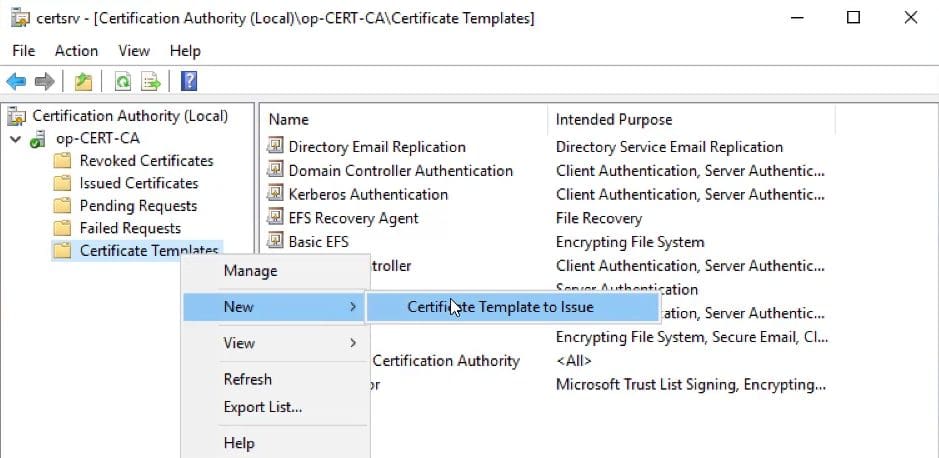
Right-click Certificate Template node. In the popup menu select New then select Certificate Template to Issue.
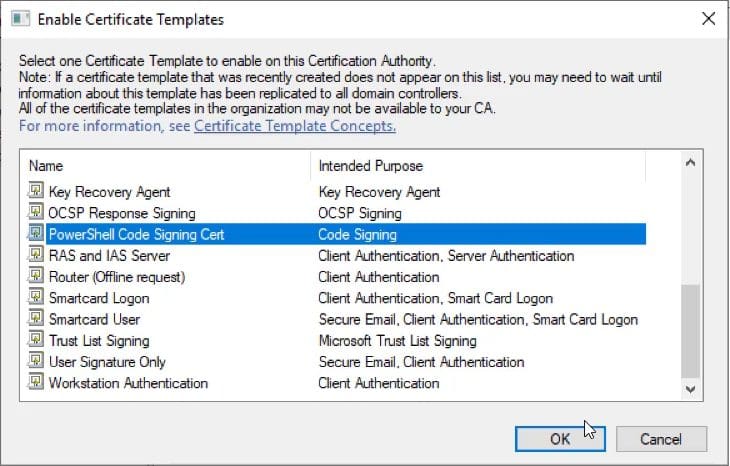
Locate the template you want to issue, select it and click OK. With that step complete the certificate template is ready to issue to your users.
How to Request a Code Signing Certificate
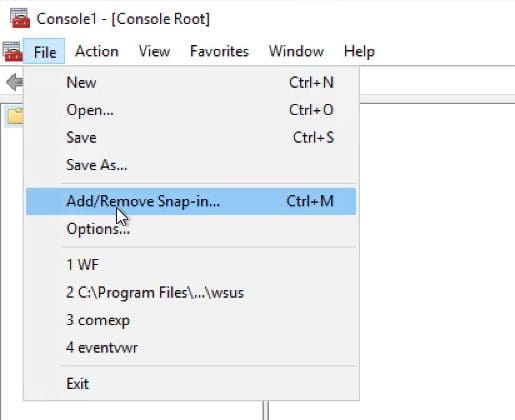
In my example, I will user the MEMCM server to request a code signing cert from my certificate server. Start my launching mmc.exe, once loaded, click the File menu and select Add/Remove Snap-in… menu item.

Select the Certificates snap-in and click Add > button.
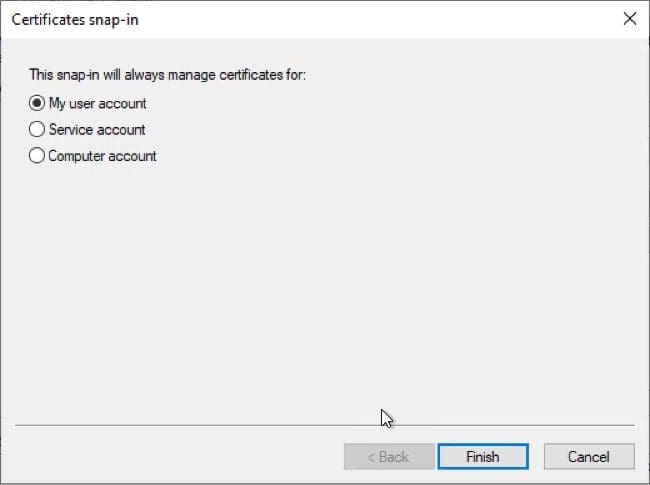
Keep the My user account option, and click Finish.
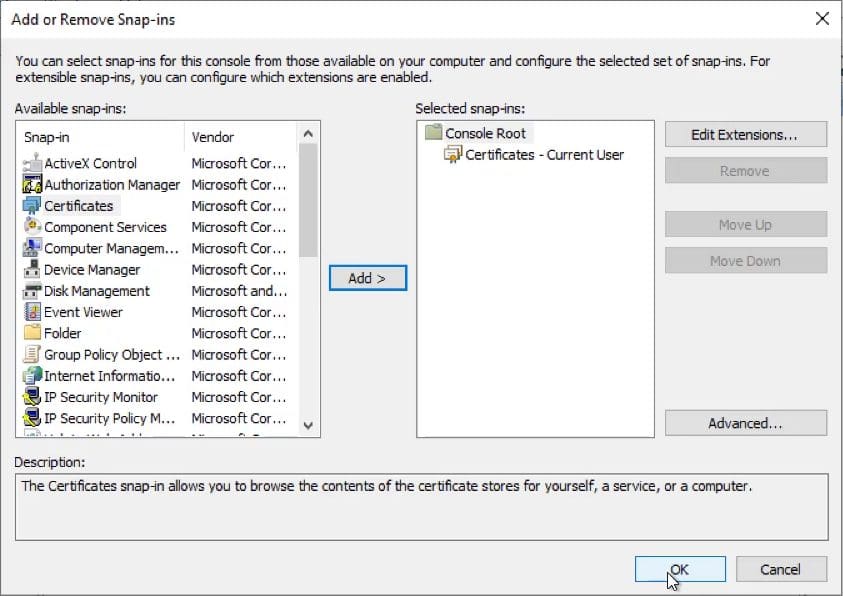
Once you return to Add or Remove Snap-Ins window, click OK to move the next step.
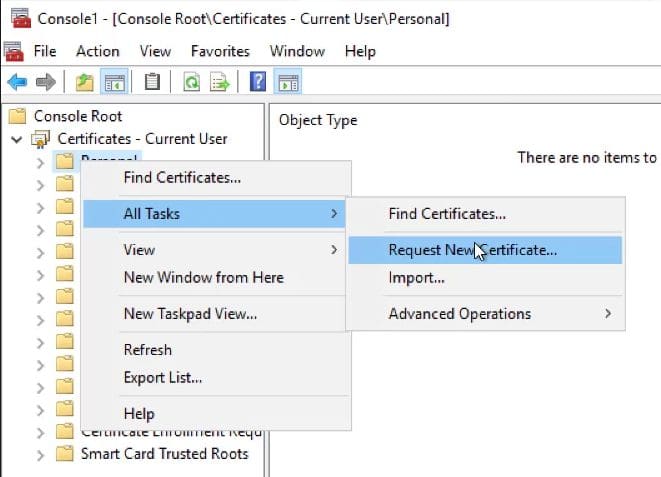
In the Console window, select Personal node (covered in the screenshot), The right click and point to All tasks then click Request New Certificate… node.
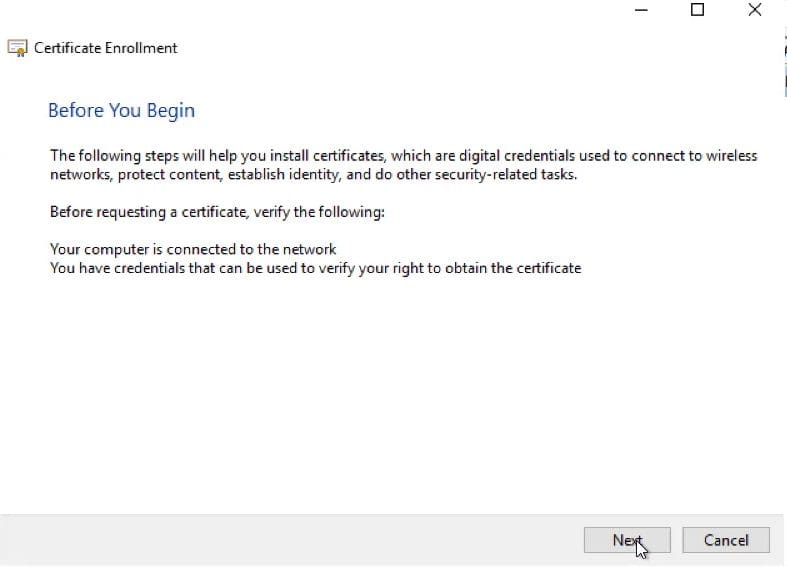
Click Next.
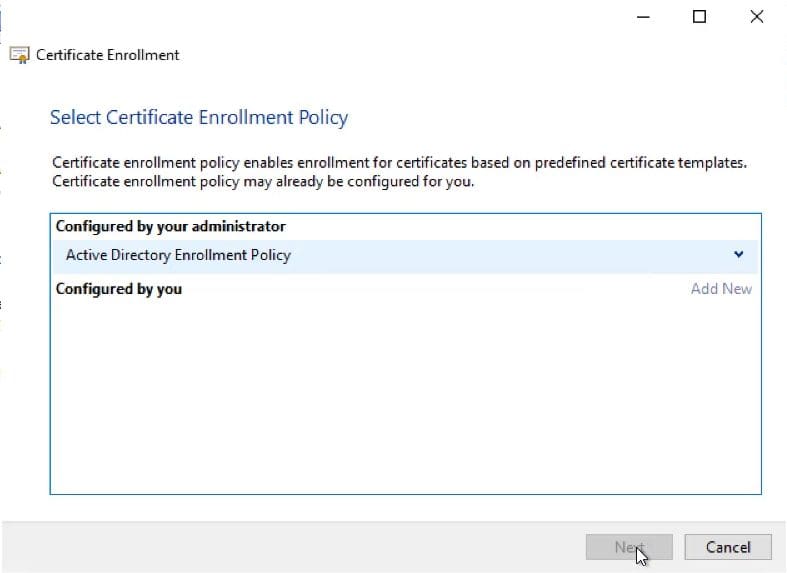
Keep the default policy and click Next.
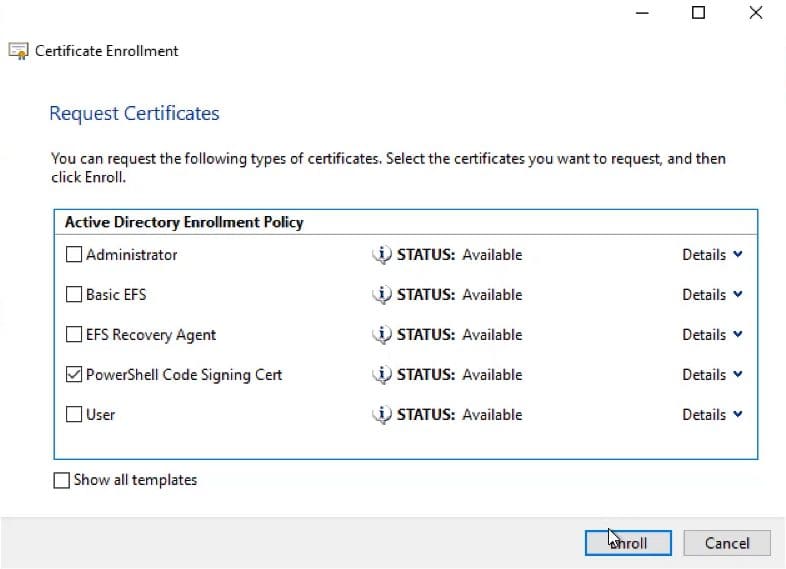
Select the check box next to the certificate template (PowerShell Code Signing Cert) that you want to request. Then click the Enroll button.
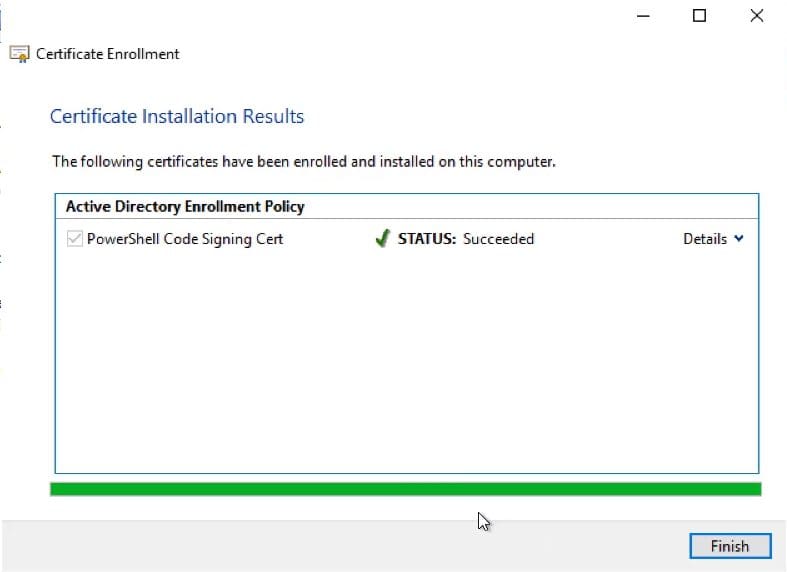
Confirm that the enrollment was successful and click Finish.

We can confirm that the certificate was issued by reviewing the Personal Certificate store on the computer for this user.
How to Create a Code Signing Certificate Video
Below is the accompanying video that show the same step by step. I have broken each stage into it own section.
I hope that you found this article useful. Finally, don’t forget that you can subscribe to my RRS feed to stay on top of the latest trips and tricks. Additionally, if you have any questions, please feel free to touch base @Garthmj.
