Last updated on April 27th, 2024 at 10:35 am
Many Intune administrators are either Azure Global Administrators or Intune Service Administrator. But what you do when you have someone who needs to create Power BI dashboard and reports? Do you really want to give them Intune Service Administrator? Doubtful. In keeping with the idea of least privileges needs. What permissions do you need to access the Intune Data Warehouse (IDW)? In this article I will show you how to create an Intune Data Warehouse Readers Group. This group will be used ONLY to grant access the oData connection for the IDW.
At the end of this article, I will include the YouTube video link that shows these details. As such, I will provide more of a high-level detail than step-by-steps.
High Level Steps
At a high level the steps four main steps:
- Create an Azure Intune Data Warehouse Readers Group
- Assign Users to the Group
- Create an Intune Data Warehouse Readers Role
- Assign the Role to the Group
Create an Azure Intune Data Warehouse Readers Group
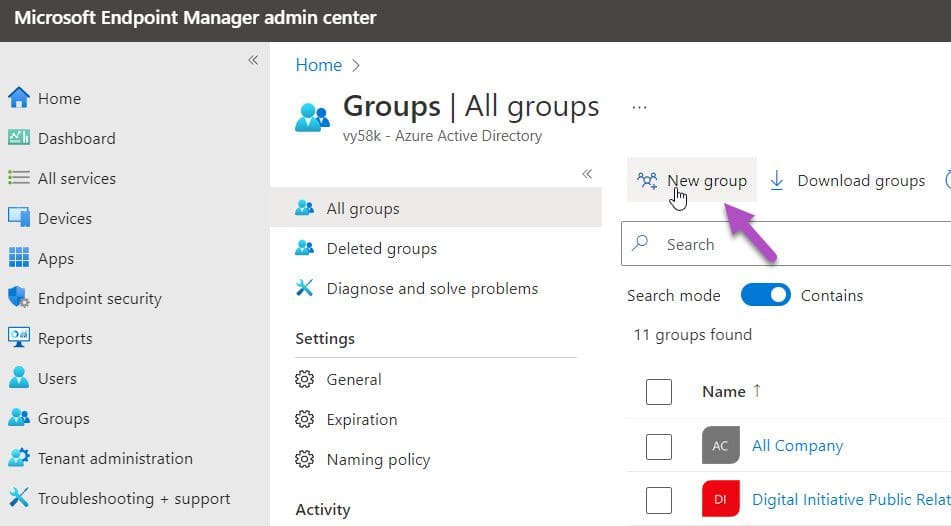
Access the Microsoft Endpoint Manager admin center then on the left side select Groups. Finally select New Group.
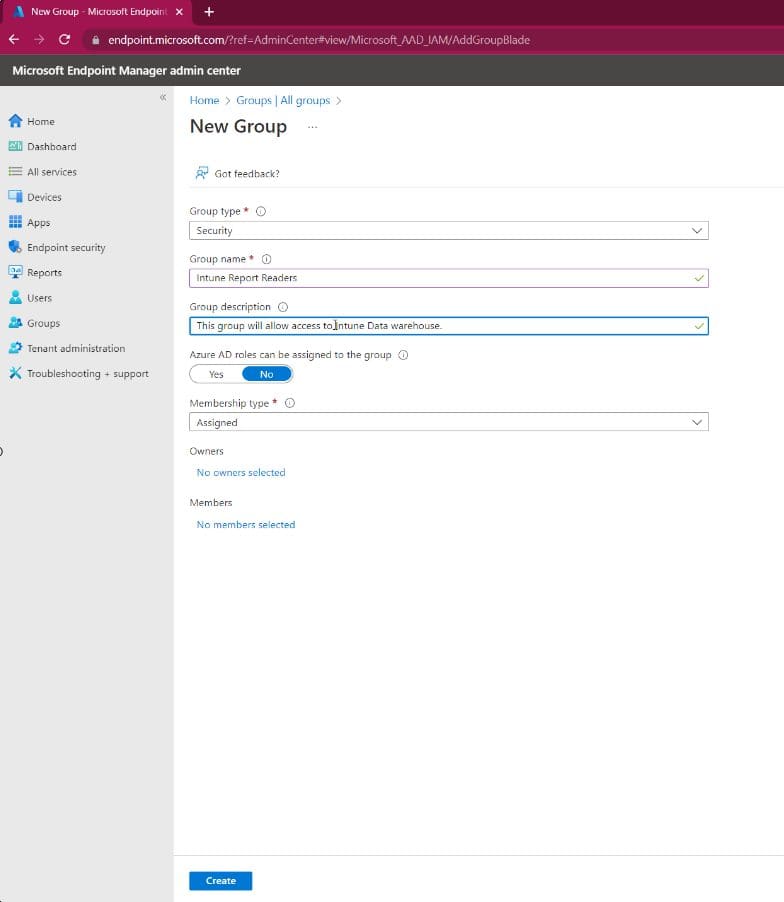
Fill in the details of the Azure group and click Create. The group will be created.
Assign Users to the Group
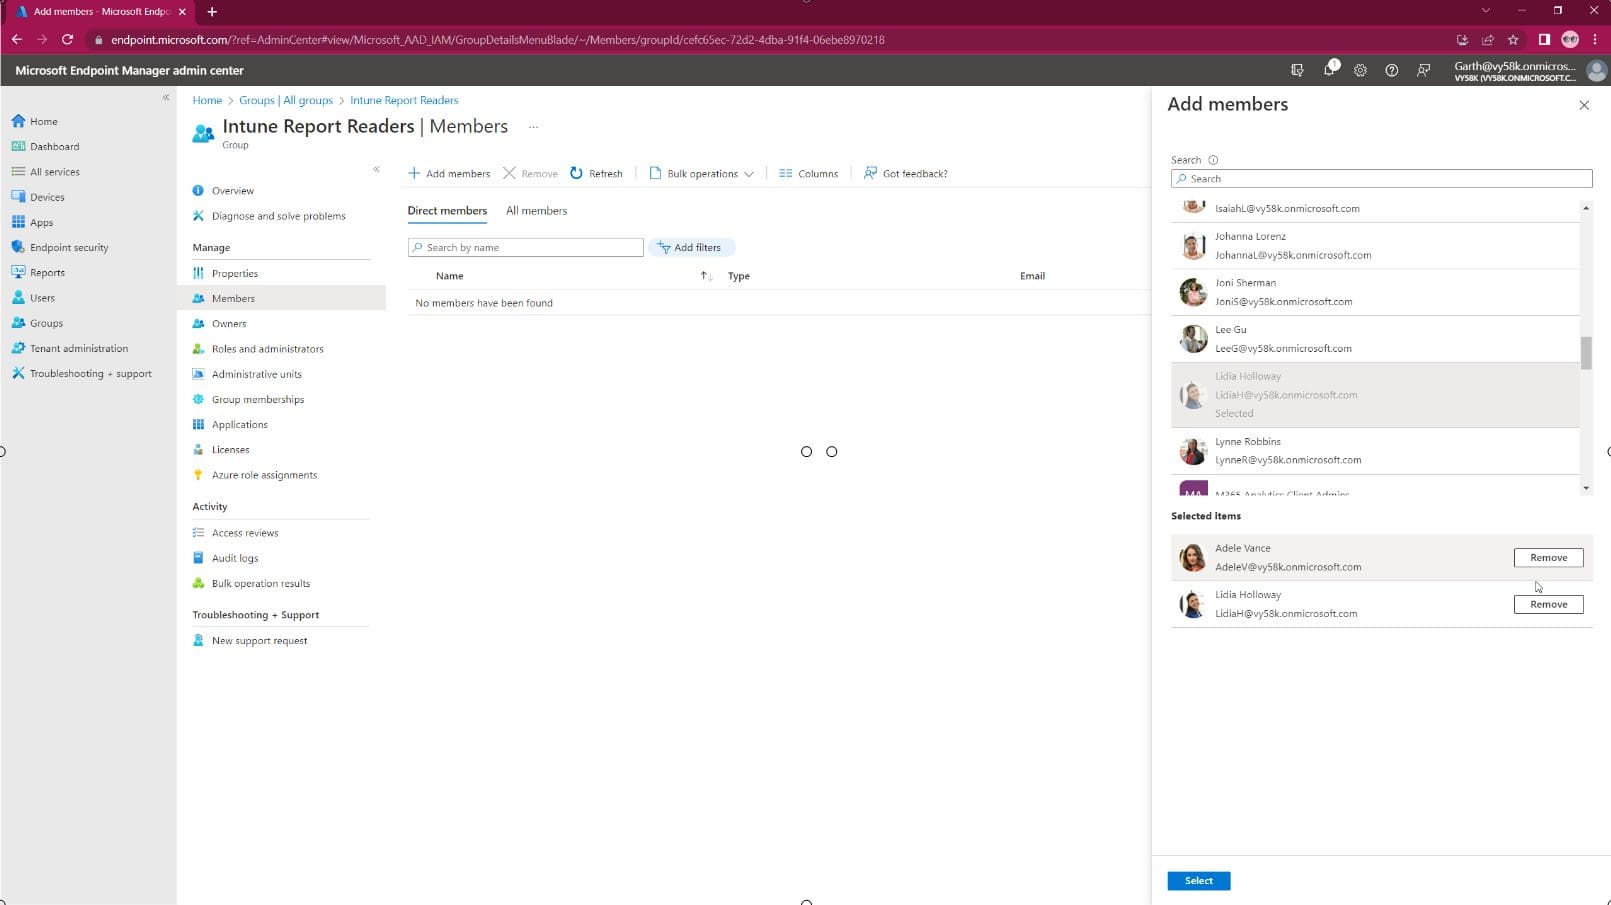
There are no tricks to this step, add users to the group as you would any other Azure group.
Create an Intune Data Warehouse Readers Role

Since all the steps are within the companion video, I’m only giving high level or important steps in this article. Within the MEM Portal, select Tenant Administration then Roles, then finally click Create button.
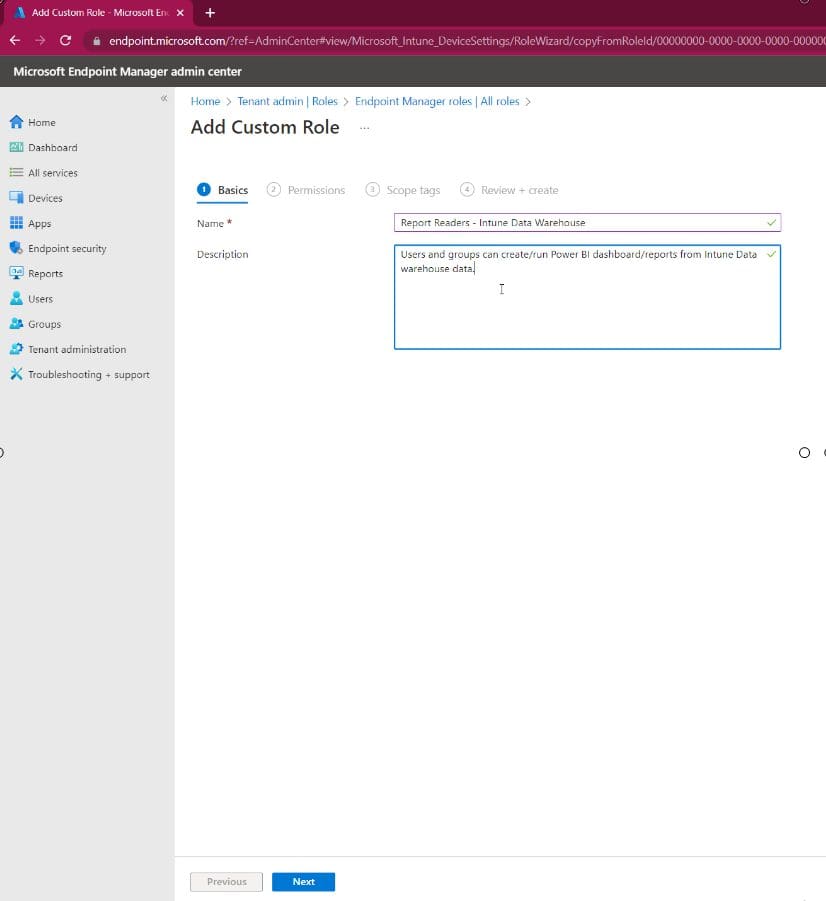
Enter the Role Name and Description before clicking Next.
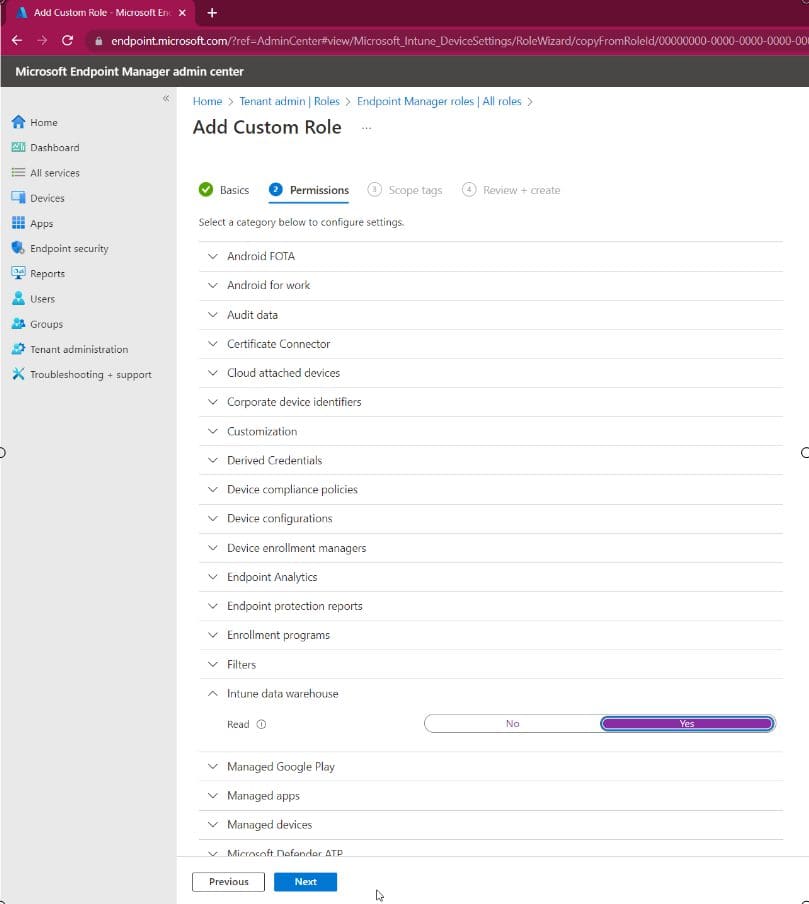
This is the important part, expand Intune data warehouse node and change Read to Yes. Then click Next. Skip over the Scope tab by clicking Next. On the Review + Create tab click the Create button in the bottom left.
Assign the Role to the Group
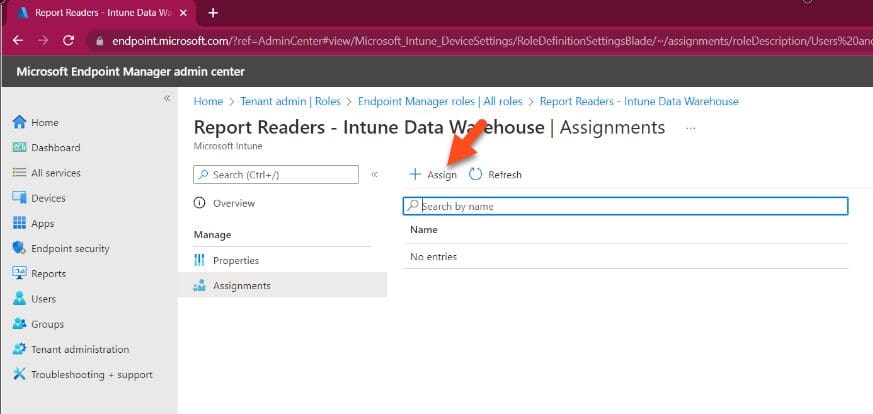
Now that the role has been created open it up and select Assignments. Do this by click Assign button.

Give the assignment a name (not shown) then add an Azure group to the Intune role.
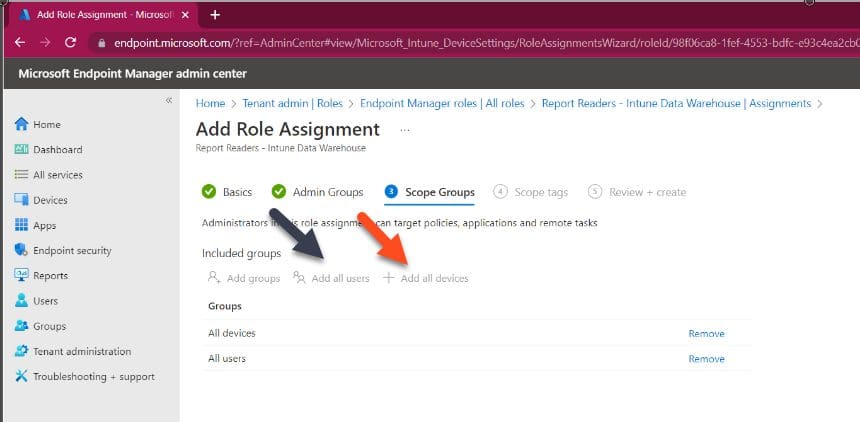
On the Scope Groups tab Click Add all users and Add all devices. This will allow the role to see all device and users within Intune data warehouse. Finish of the rest of the wizard by selecting Next and Create buttons.
With that last step done, now your Power BI Report readers or creators can access Intune data warehouse details with the minimum of permissions.
We couldn’t authenticate with the credentials provided
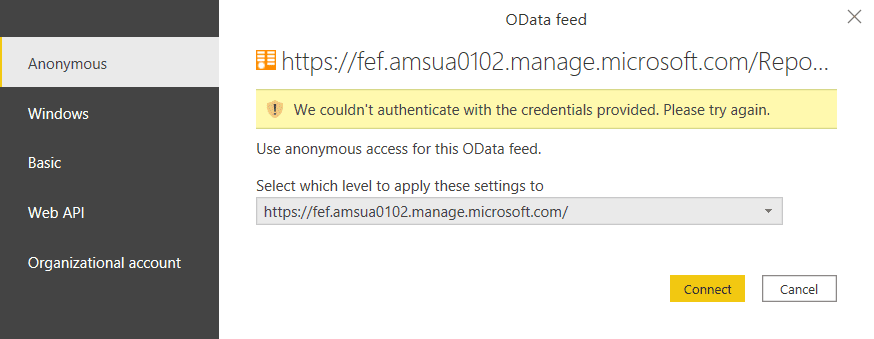
When connecting your Intune Data Warehouse, with Power BI and you created the following error message. “We couldn’t authenticate with the credentials provided. Please try again.” It likely means that you don’t have rights to access IDW. And this article if for you!
Below is the full video on how to create an Intune Data Warehouse Readers Group from start to finish.
Summary
To sum up, with just a few minutes of effort, you too allow anyone to access your Intune Data warehouse with Power BI. If you have any questions, please feel free to touch base @Garthmj.
