Last updated on August 6th, 2022 at 04:02 pm
I was surprised to discover that with all of my blog posts about reporting in System Center Configuration Manager (SCCM) current branch, I don’t actually have one on how to install SQL Server. In order to remedy this, I will show you how I installed SQL Server 2017 for use with the SCCM current branch reporting services point. This post is the first of three. This one focuses on how to install SQL Server 2017.
Background
As you probably already know, Enhansoft, where I’m the Chief Architect, specializes in using SCCM to collect extra inventory details about computer warranties, computer monitors, local administrator group names, etc. Once these details are all inventoried and returned to SCCM, our customers need to see them in easy-to-read reports. After the reports are created, we test all of them on each version of SQL Server. Since I needed to setup SQL Server Reporting Services (SSRS) 2017 a second time (for a new reporting services point in my lab) I decided to put together a blog post series about how to install SSRS. This post is the first of three.
Virtual Machine Details
I know people will ask, so below are the details about the VM I am using in my lab.
- C: 127 GB VHD – OS only.
- E: 127 GB VHD – SQL Server/SSRS/databases/etc.
- 2 Virtual CPUs.
- Enabled Dynamic Memory is set to allow for a maximum memory of 512MB to 8GB.
- Windows 2016 Datacenter is installed.
Why didn’t I split-up the databases from the SQL Server itself or from the temp databases? The simple answer is: I know this server will never get overloaded. All of the VHDs sit on the same RAID 10 disk, so they all share the same disk I/O. By the way, from a performance standpoint, you gain very little by adding extra VHDs to split-up the virtual disk I/O as it is limited by the physical disk I/O. IMO – adding an extra VHD wastes a TON of extra physical hard drive space, especially if the VHDs have a fixed size.
Install SQL Server 2017
Once the SQL Server ISO is linked to the VM, click on the Setup.exe file.
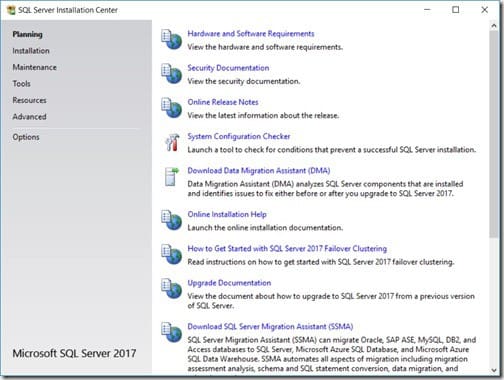
Click on the Installation node.
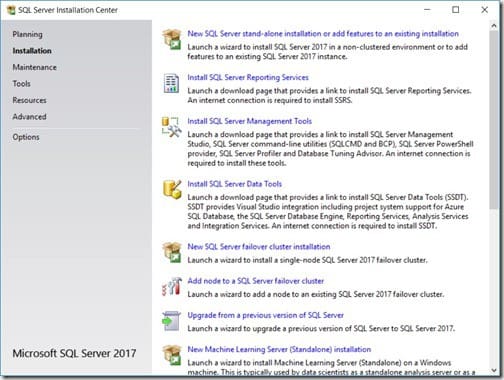
Next, click on the New SQL Server stand-alone installation or add features to an existing installation link.
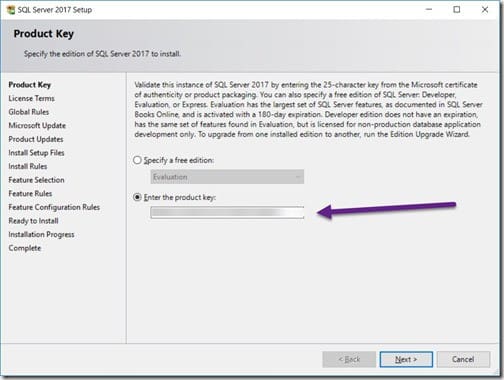
Record the product key if you plan to install SSRS. You can thank me later! Click Next.
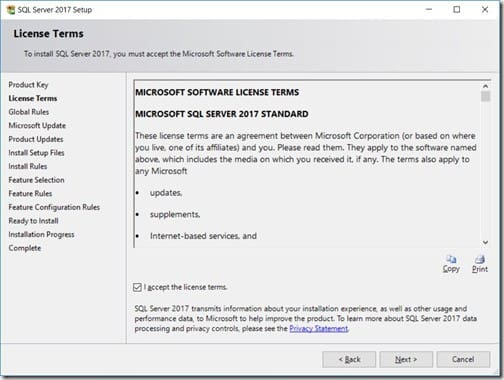
Select, I accept the license terms, and then click Next.
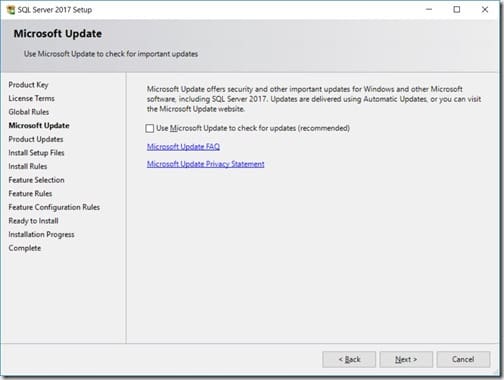
If everything is successful in the Global Rules node, you are automatically forwarded to the Microsoft Update node. Click Next.
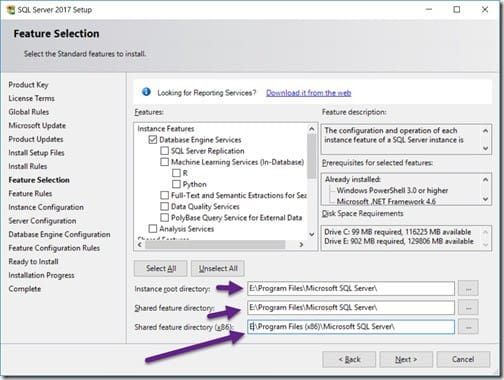
And, if everything is successful on the Product Updates, Install Setup Files and Install Rules nodes, you are automatically forwarded to the Feature Selection node.
Here, select the Database Engine Services checkbox.
Ensure that you change the Instance root directory, Shared feature directory and Shared feature directory (x86) to E:\. These directories should never be installed on the operating system (OS) drive!
Once completed, click on the Next button.
Instance
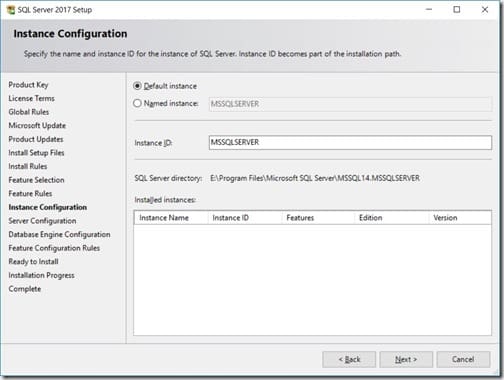
If everything is successful on the Feature Rules node, you are automatically forwarded to the Instance Configuration node.
Here I use the Default instance and I also recommend that you use it too as it will cause less headaches down the road! Click Next.
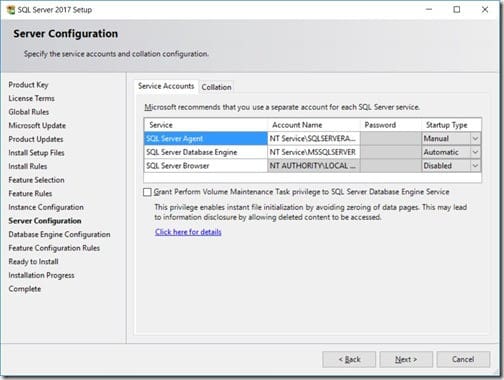
I’m not going to make any changes on the Server Configuration node. Unless you have a reason, I also recommend that you leave both the Service Accounts and Collation information alone. Click Next.
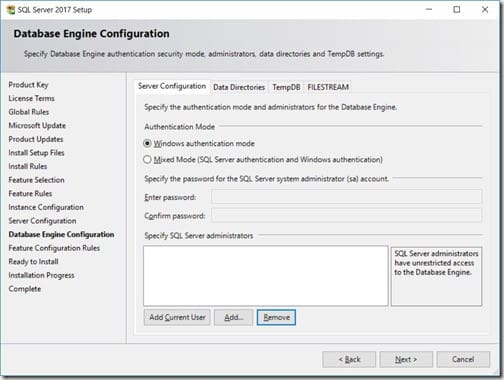
Keeping with best practices, you shouldn’t add your personal account to any IT servers. Instead use an AD security group. In the Database Engine Configuration node, click on the Add… button.
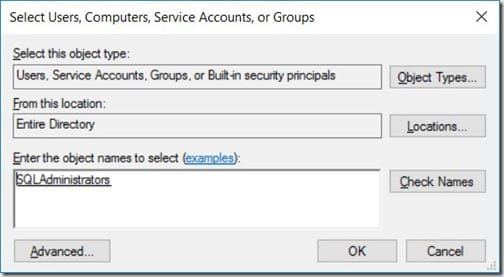
Add your SQL Server administrators group and click OK.
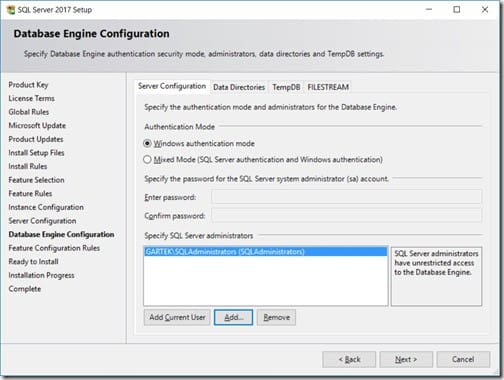
For the remainder of the setup, I’m going to leave the default information alone. Simply click Next until you arrive at the Ready to Install node.
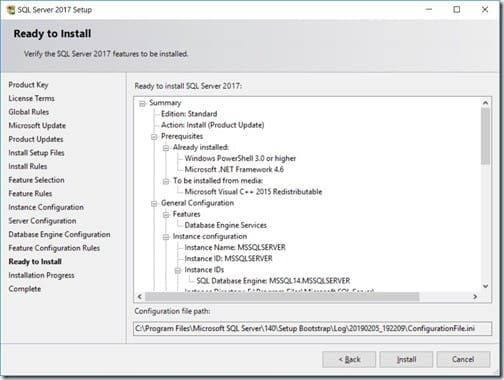
Click on the Install button in order to start the installation of SQL Server 2017.
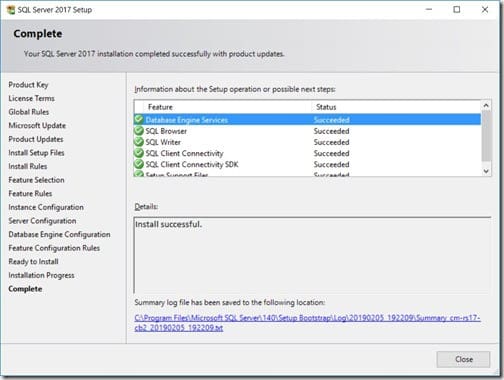
If everything is successful on the Ready to Install and Installation Progress nodes, you are automatically forwarded to the Complete node. Once the install is successfully completed, click on the Close button.
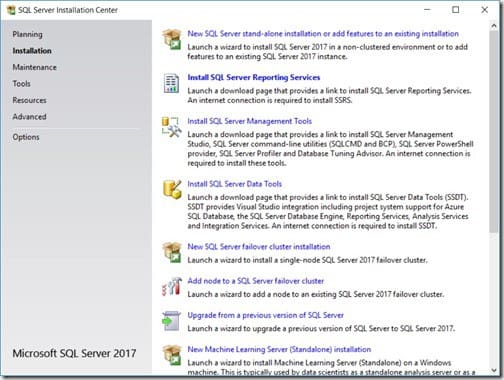
Finally, close the SQL Server Installation Center window. With that last step completed you successfully installed SQL Server 2017 for use with SSRS. This is a component of what is needed for the SCCM current branch reporting services point.
Summary
Stay tuned because next week’s blog post shows you how to install SSRS. The final post in this series shows how to setup the SCCM current branch reporting services point by using the SSRS site.
If you have any questions about how to install SQL Server 2017, please feel free to contact me at @GarthMJ.
