Last updated on September 28th, 2022 at 09:35 am
We decided to update one of our reports in Recast Endpoint Insights to give it a more modern look and feel. Part of the enhancement involved purchasing some stock images of icons, re-sizing them and then modifying the color to match our branding. It was a completely new exercise for me, so I decided to document the steps on how to tint images using Snagit 2019 Editor and to share this information with you! Your first question might be, “Why Snagit?” The simple answer is that this is the tool that I have on hand.
Background
Not long ago, I created a report called Locate Computers by Username. We ended up using this report as March’s giveaway. The feedback I heard about this report was great! One item, however, that stood out was that this report needed a drill-down report. Folks wanted to see more details about each individual computer.
We decided not to create a completely new report, but rather to update one that already existed in Recast Endpoint Insights. The All-in-One Computer View report was already on-track to be updated, so this was the perfect opportunity.
Stock Images
Since I’m working with stock images, I know one size (or color) does not fit all.

Above is one of the stock images we purchased. The original has 12 icons within a 3000px x 3000px space. In this case I not only needed to reduce the size from 3000px x 3000px to 100px x 100px, but I also needed to modify the color. I will use this stock image to demonstrate how to tint images using Snagit.
Tint Images Using Snagit
First, open Snagit 2019 Editor.
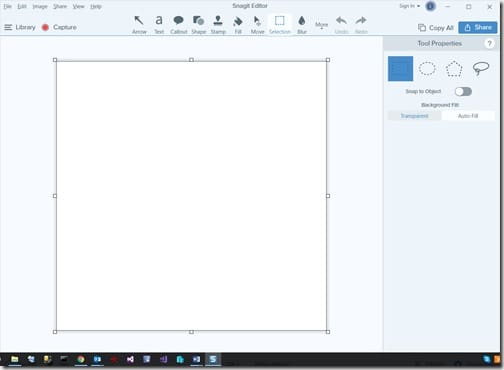
Once open, you can see the default canvas. What’s not so obvious is that the canvas is transparent.
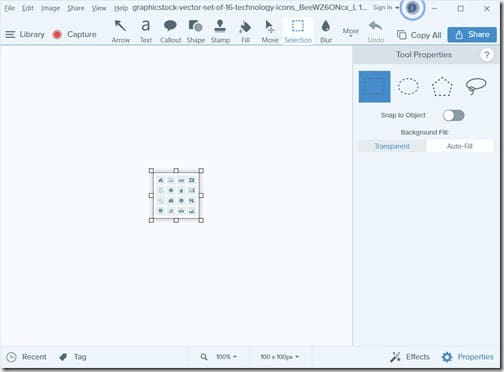
From the File menu open the image that you want to modify the color.

Right-click on the canvas and select Canvas Color…
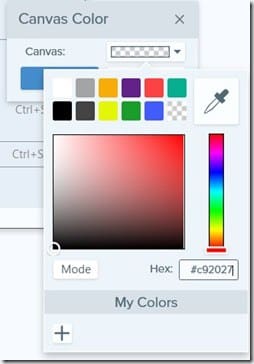
Enter the hex color code (in this case it’s #C92027 – Enhansoft Red) and then click OK to close the Canvas Color window.
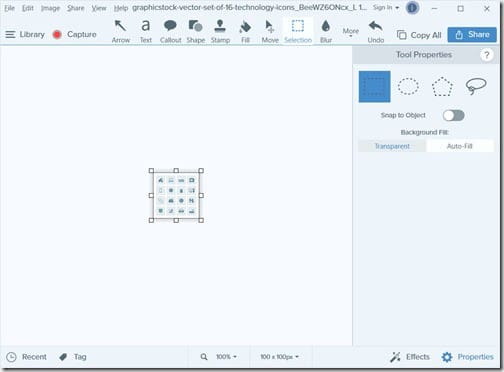
When you return back to your image, it looks like there were NO changes made to it. What’s going on?!
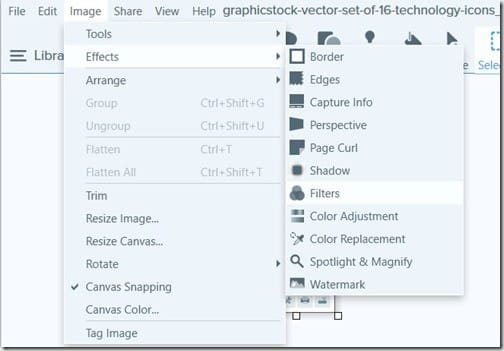
From the Image menu, select Effects and then Filters.
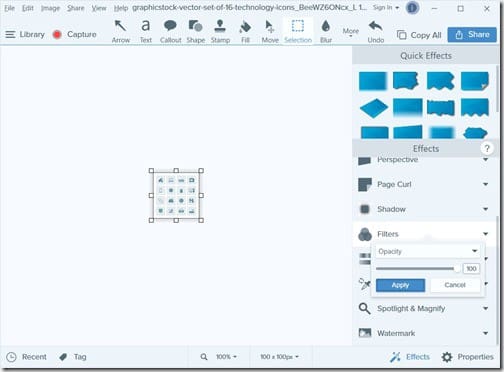
The Effects bar now opens on the right-hand side. Why is opacity set to 100%? What is opacity?
I couldn’t find a good article on Snagit’s site, so I turned to Adobe Photoshop:
“In digital photography, transparency is the functionality that supports transparent areas in an image or image layer. Certain image formats do not support transparency. Opacity is the extent to which something blocks light. You can change the opacity of layers, filters, and effects so that more (or less) of the underlying image shows through.”

Simply by changing the opacity setting of the background canvas to 50%, the color red shows through the image; thereby tinting it.
You can see what I mean in the above screenshots. The image on the left’s setting is 100% opacity or as it is sometimes referred to, 100% opaque. Whereas the image on the right has a setting of 50% opacity, thereby letting the color red “bleed” through.
End Result

In order to update the All-in-One Computer View report, I cut out each tinted icon image and placed it on a white background. That’s what went into the report.
In the screenshot above, you can see the progression from start to finish. The left one is the original image, the middle one is the icon tinted red, and the last one on the right is the final version. I simply cut out the tinted icon and placed it on a white background. Now you know how easy it is to tint images using Snagit!
If you have any questions about how to tint images using Snagit, please feel free to contact me at @GarthMJ.
