Last updated on August 2nd, 2022 at 09:41 am
In this blog post I will continue to show you how to create an Android virtual machine (VM). Once the VM is created, you need to install Android 4.4 R5.
1. Download Android 4.4-R5 ISO.
2. Ensure that the Android ISO is attached to the VM.
3. Start the VM and then connect to the VM.
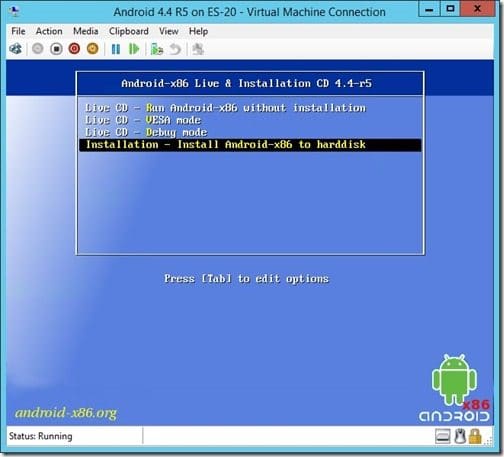
4. Type the letter, “I,” to begin the installation.
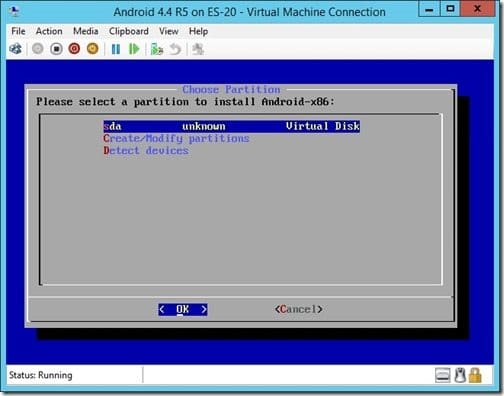
5. Type the letter, “C,” to Create/Modify partitions.
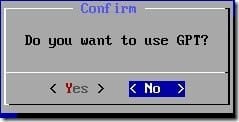
6. Click No to GPT.
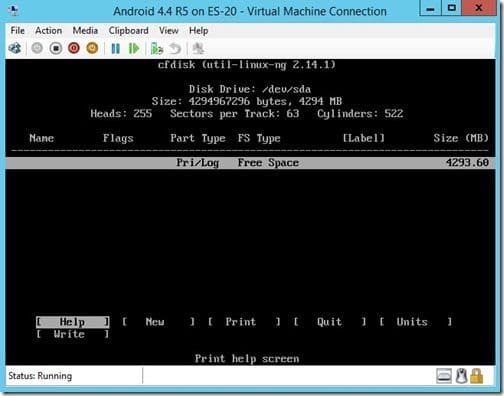
7. Select New.
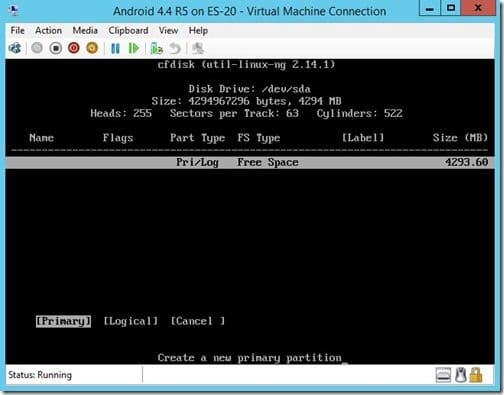
8. Select Primary.
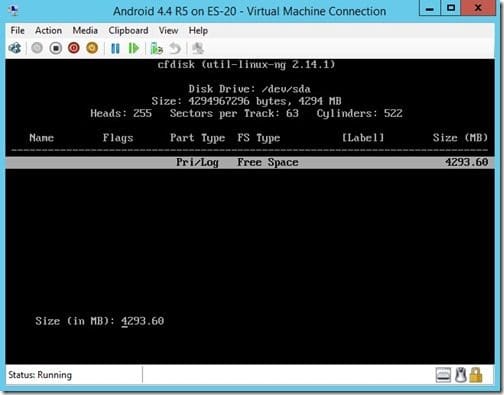
9. Hit Enter to use the full drive size.
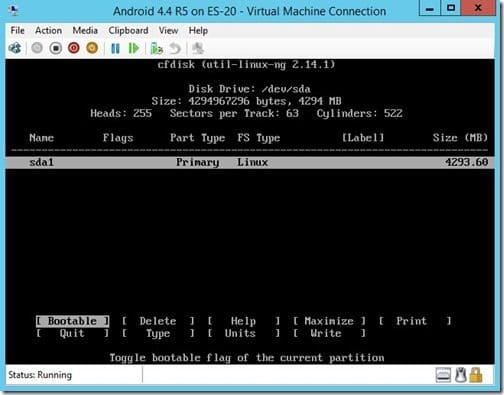
10. Select Bootable.
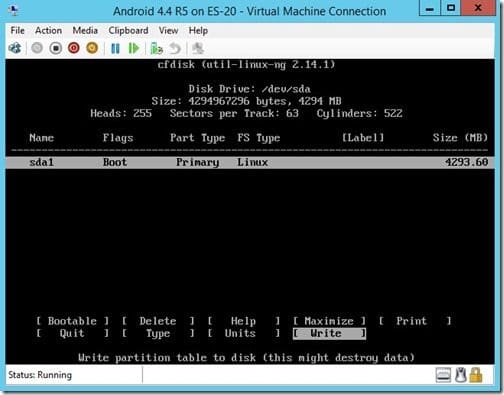
11. Select Write.
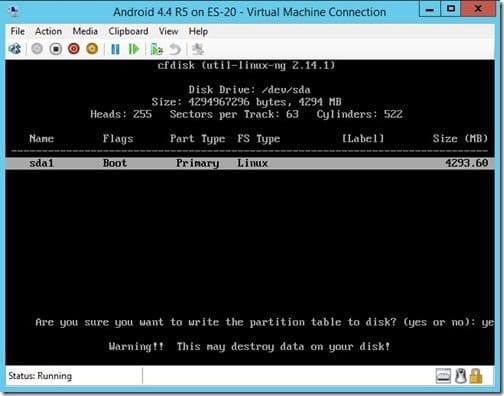
12. Type yes (trust me the “s” is there).
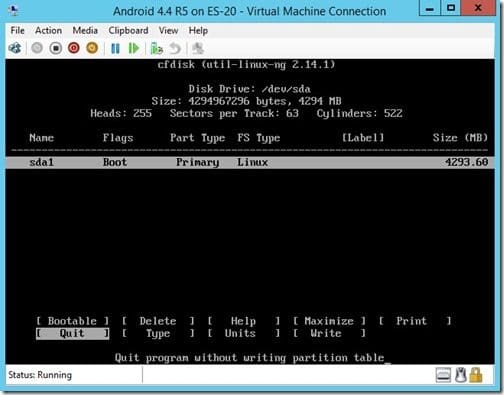
13. Select Quit.

14. Select OK.
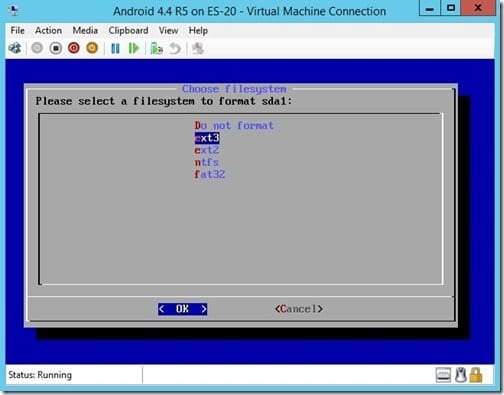
15. Select the ext3 file format.
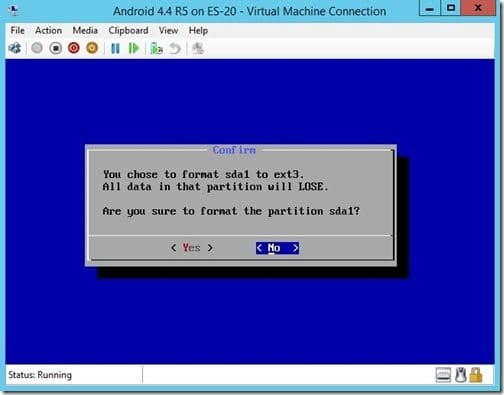
16. Select Yes to format the partition.
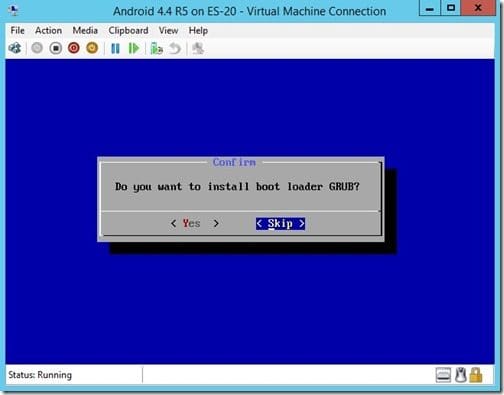
17. Select Yes to install the boot loader GRUB.
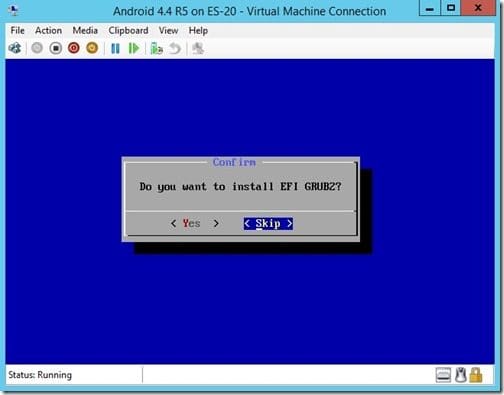
18. Select Skip for the EFI GRUB2.
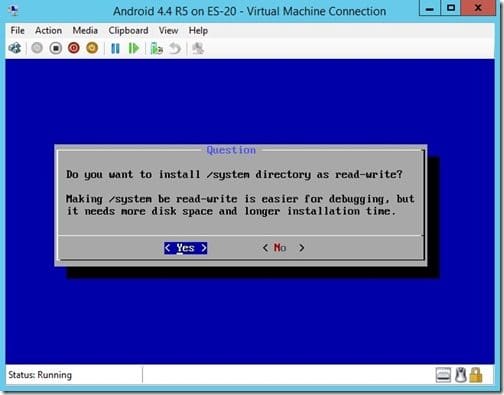
19. Select No to the System Directory.
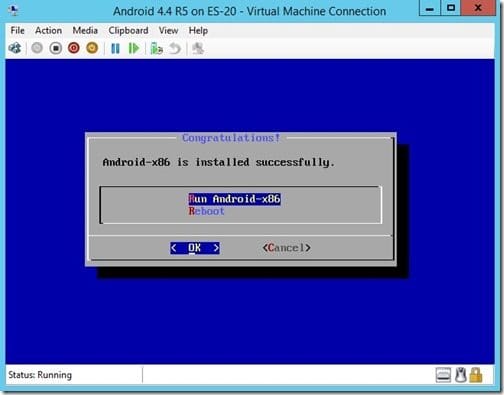
20. I like to select Reboot at this stage to ensure that everything is setup correctly. Don’t forget to remove the ISO before rebooting.
With that last step completed, the Android is installed on a Hyper-V VM. The next step will be to configure the Android device once it reboots. Those steps will be in tomorrow’s blog post. In the meantime, if you have any questions about how to install Android on a VM, please contact me on Twitter @GarthMJ. Or, you can leave me a note in the comment section below.
