
I am preparing a few sessions for Midwest Management Summit at the Mall of America (MMSMOA) this May. While doing so, I need to create an Entra ID Application to access Intune data via Microsoft Graph. It is one of those things that I don’t do often, so I always look up the steps. I normally end up on the Microsoft Docs site, but I find that they are missing steps or missing details. As such I’m left scratching my head for a while trying to figure out what they mean. So, this guide is here to fill in the blanks on how to create an Entra ID Application.
How to create an Entra ID Application?

Start by logon to your Entera ID portal. Then select App registrations on the left side menu.
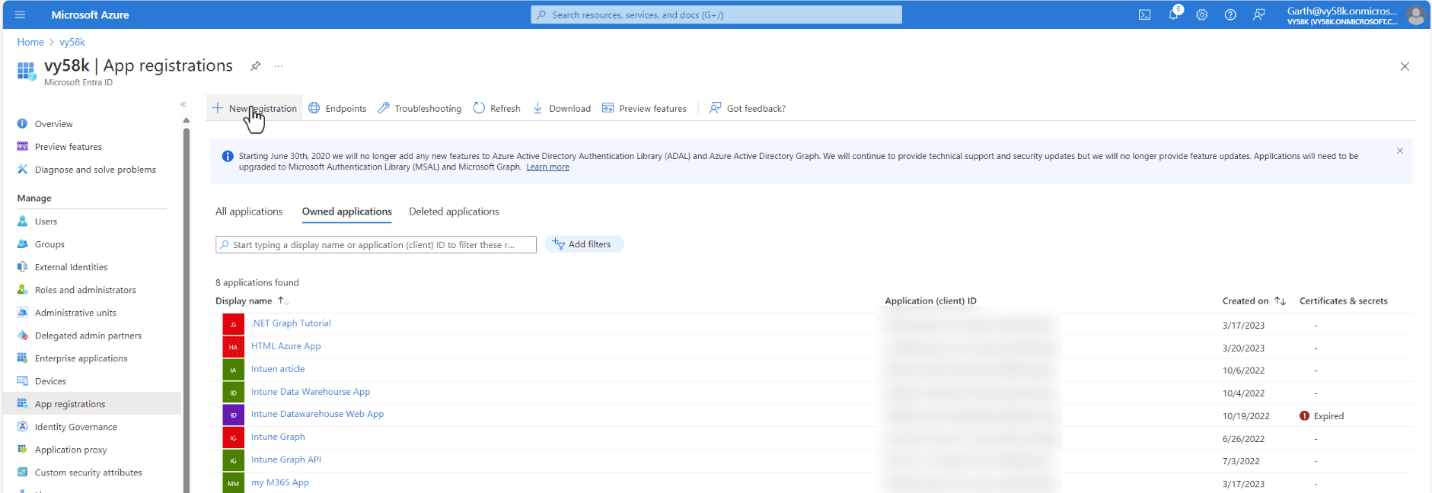
Select New Registration.
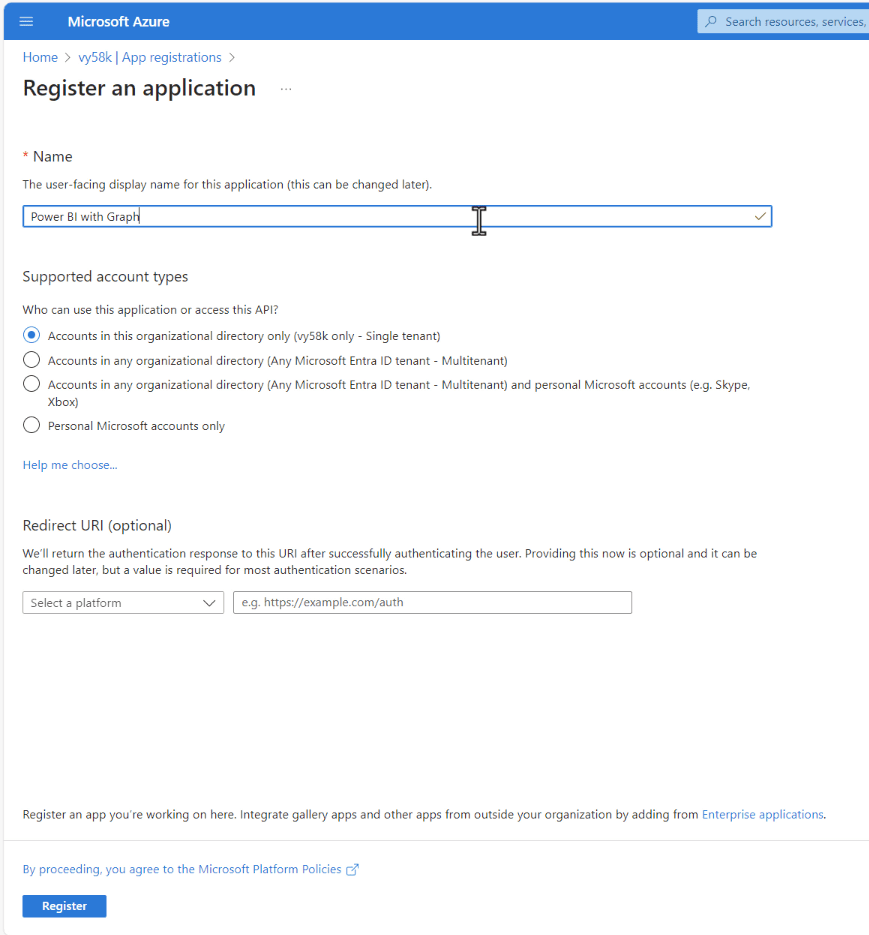
Give the application a name. in my case Power BI with Graph. Leave everything else as is then click Register.
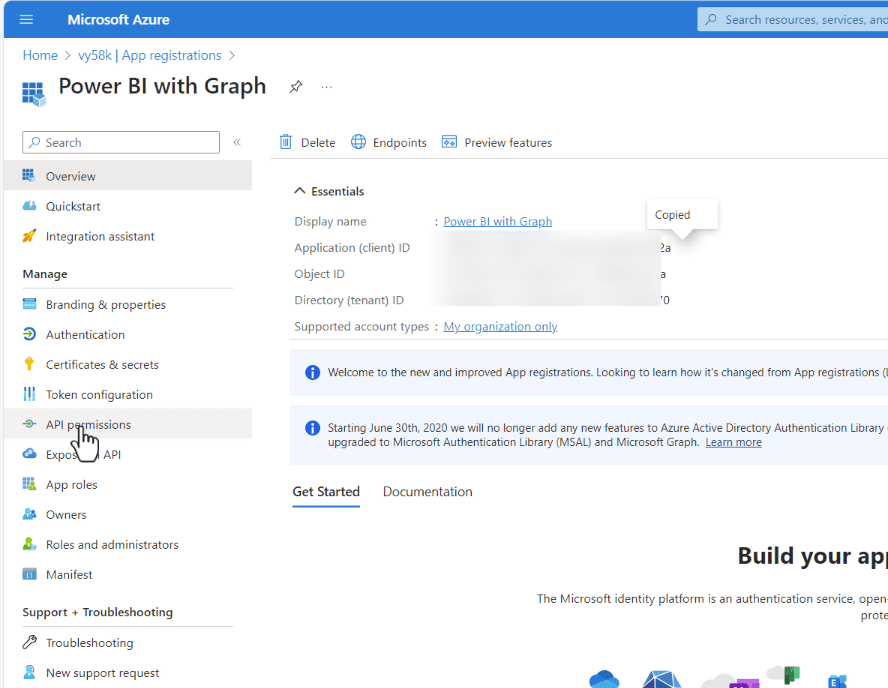
Now that the application is created, copy the Application (client) ID to notepad. Then select API permissions in the left menu.
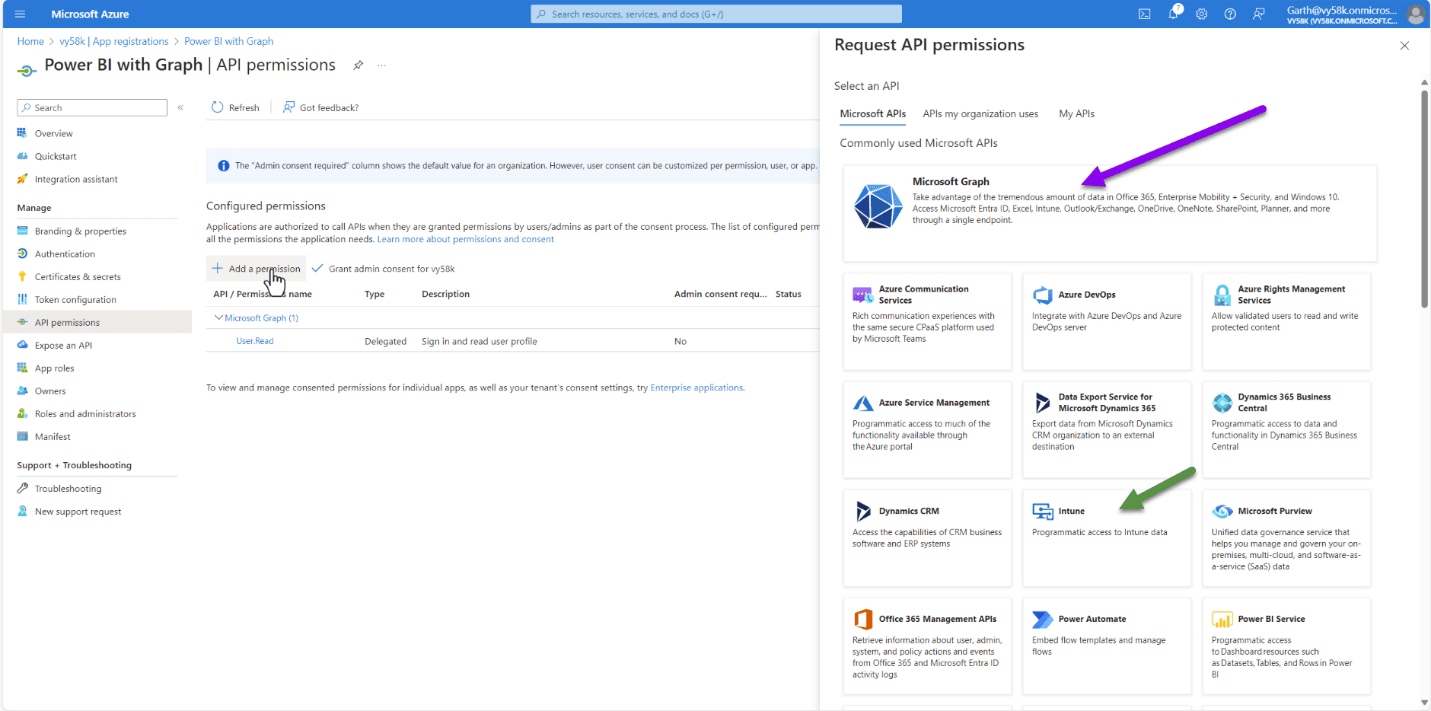
On the API permission page, select Add a Permission. Then in the flyout, select Graph (purple arrow). A bit later you will repeat the steps and select Intune (green arrow).
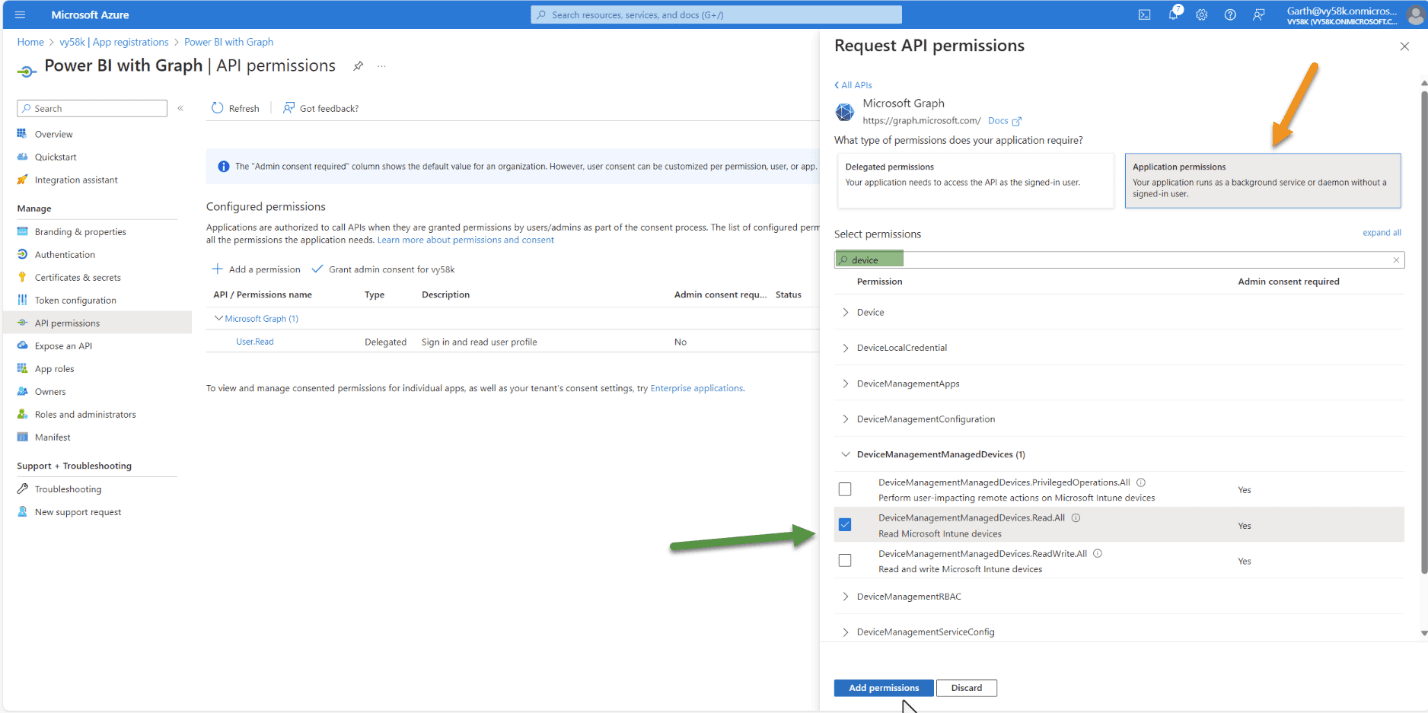
On the Request API permissions flyout, select Application Permissions (orange arrow). This will expose the Select permission section. Type device (green highlighted area) to filter permission then select DeviceManagementManagedDevices.Read.All (green arrow) option. Finally, we Select Add permissions.
Permissions
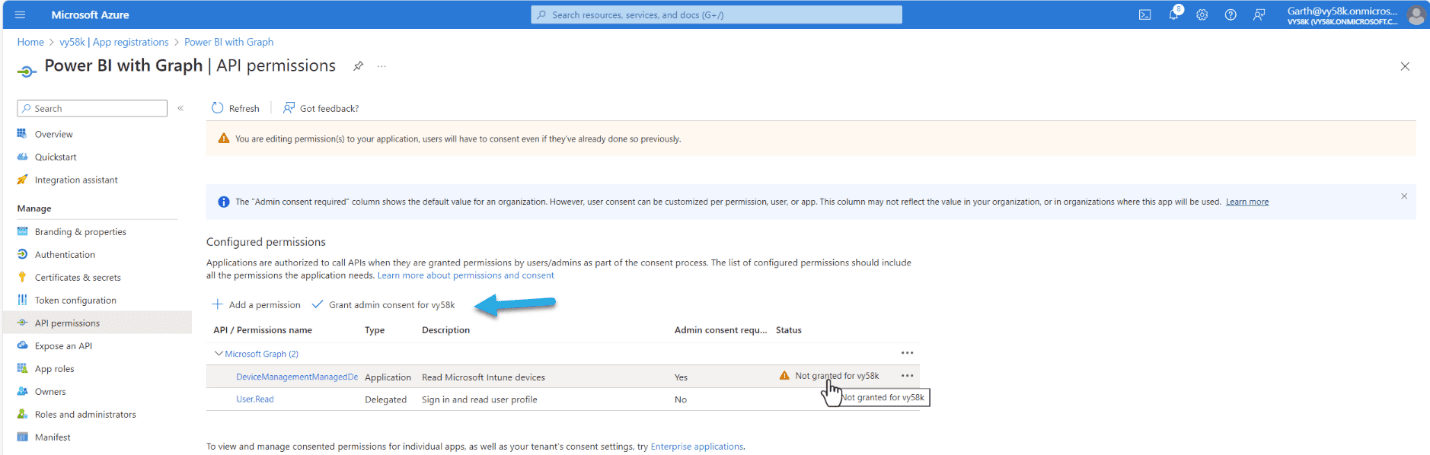
Back in the API Permission pane, we can see the status of the new permission is flagged as Not Granted for <tenant name>. Don’t worry if it is “green” as it means someone has already granted permission to organization already. Select the Grant admin consent for <tenant name> (blue arrow).

On the popup, select yes to complete the consent for the new permissions.
Data Warehouse

We are going to repeat the steps but this time for Intune data warehouse. Select Add a Permission. Then in the flyout, select Intune (previously shown). On the Request API permissions flyout, select Application Permissions. This will expose the Select permission section. Next select get_data_warehouse option. Finally, we Select Add permissions.

Upon returning to the API Permission pane, you again might need to Grant admin consent as we previously performed. Your pane should look as follows. Next select Certificates & secrets, from the left menu.
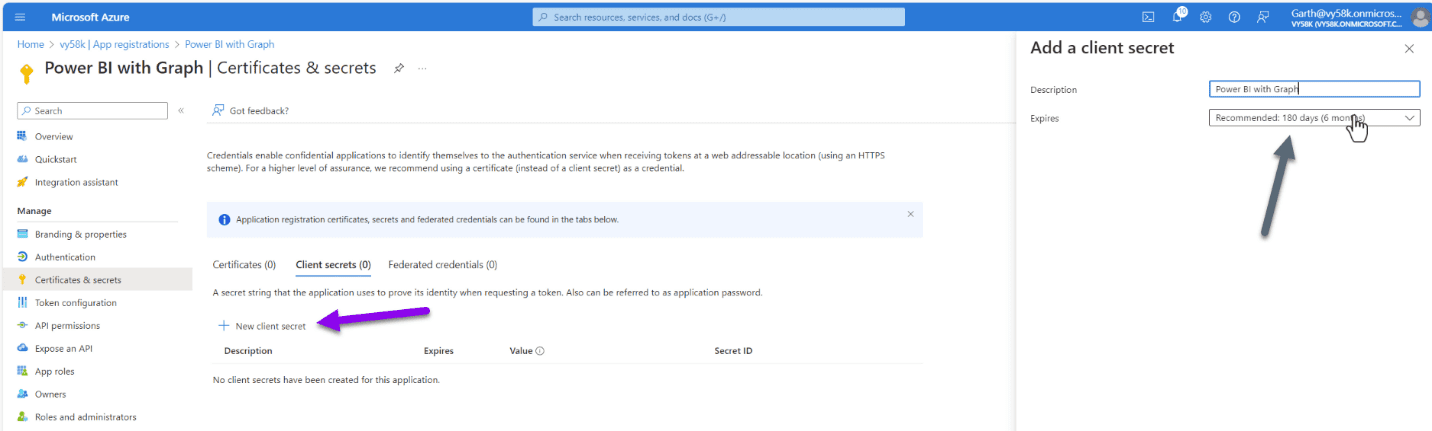
Now select New client secret (purple arrow), in the flyout, add a description for this secret and select how now this secret is valid for the maximum of 24 months. Before clicking Add (not shown).
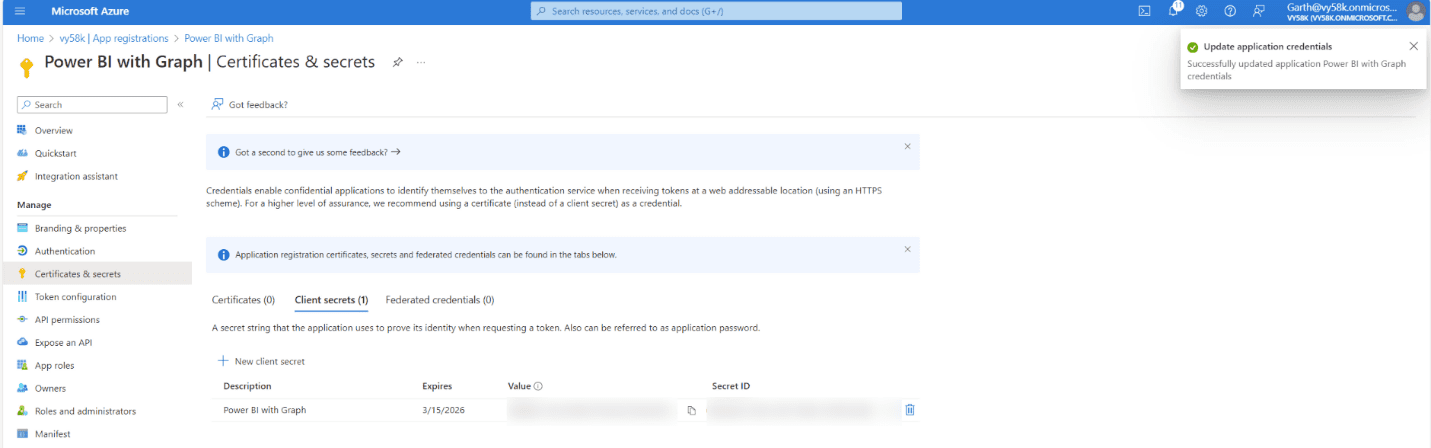
At this point, it is import to copy the Secret id and Value. Once you move away from this screen the value can not longer be retrieved. If you forget the value, you will need to create a new secret, which as you see is not a big deal. At this point you are done your app is ready to be used. I will show you how to use Entra ID Application along with the Microsoft Entra Id Tenant id with Power BI after MMS.
How to create an Entra ID Application Video
Hopefully you found this useful and you too can use this within your projects. If you have any questions about How to create an Entra ID Application – Step by step guide. Please feel free to contact me @GarthMJ Please also subscribe to my YouTube channel and newsletter.