Last updated on July 23rd, 2022 at 12:23 pm
In a recent blog post, How to Expand a Disk within a VM That Is Using a VHD File, I showed you how to expand a VHDX file in logical disk size. I did this because I had a problem with the auto-growth of my SQL Server logs. Now that this problem is fixed, I want to return the VHDX file back to its normal logical size of 128GB, and make the VHDX file as small as possible. This blog post will show you how to shrink the size of a VHD file.
I can hear some of you saying, “Why? You are using a dynamically expanding VHDX file, so why bother compacting and shrinking the file?”
Refresher
As a refresher, remember that a dynamically expanding VHDX file will start at a few MBs and grow as files are added to the virtual hard drive. If you delete a file within the virtual hard drive, the space is freed up only with the virtual hard drive and not from the physical VHDX files. To put it another way, once the VHDX file is expanded, it will never shrink without you following these steps.
Here are a few reasons why you would want to shrink the VHDX file:
· Shrinking the VHDX file to the smallest possible size will save disk space on the host.
· A small VHDX file leads to faster backups. 3GB is a lot faster to copy than 128GB or 256GB.
· If a problem like the SQL Server log auto-growth happens again, I want to know about it sooner rather than later. By having a small logical VHDX file size, this problem will be seen, hopefully, earlier.
How to Compact Size of a VHD File
To begin with, I always recommend that you never install anything on the C:\ drive. It can be a huge pain to logon to a server when the C:\ drive is out of space. This of course will depend on your GPO security settings!
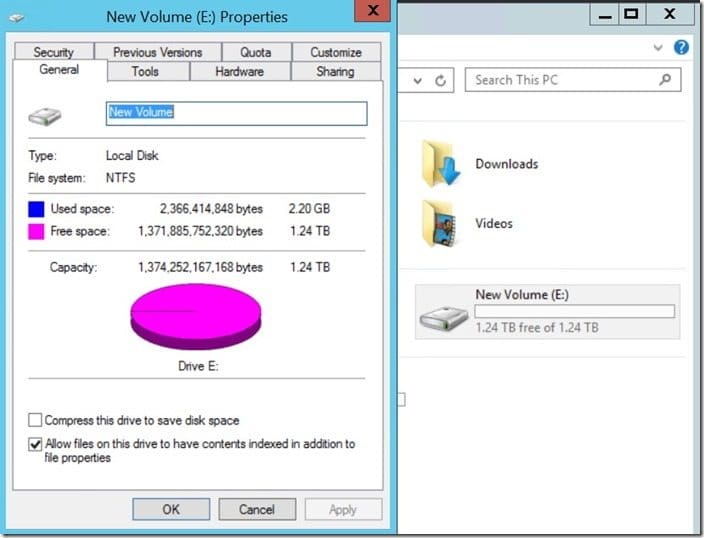
In my blog post, How to Expand a Disk within a VM That Is Using a VHD File, I expanded my VHDX file to 1.2TB. In a later blog post, What Is the Problem with My SSRS Server?, I cleaned up the SSRS log file, thereby returning the server to its normal operating state. The screenshot above shows you that I cleaned up my virtual hard drive and that 1.24TB are free and only 2.2GB of space are used.
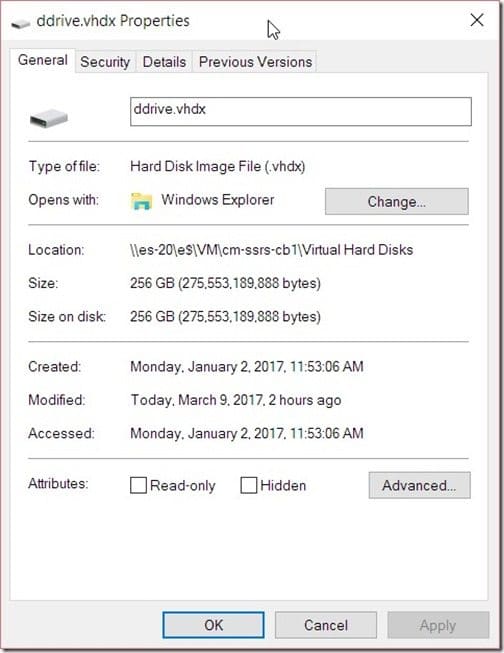
Now looking at the physical VHDX file, I can see that it is 256GB in size (of a possible 1.2TB), but in the first screenshot you can see it’s using a little over 2.2GB of space within the VHDX file. Using the processes below, I will first shrink the volume size to 128GB then compact the physical VHDX file to the smallest possible size.
How do you go about this process? In a nutshell, I will perform the same steps I did to expand the VHD, but in reverse. I need to start with the VM itself by cleaning-up, defragging and shrinking the volume size.
VM Clean-up Tasks
There are several things to note before getting started:
- You should make a copy of the VHDX file before starting, or have a good backup of the server.
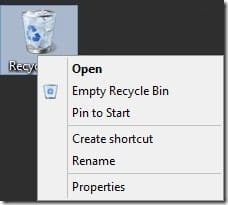
- Within the VM make sure that the Recycle Bin is emptied.
- You need to defrag the drive BEFORE shrinking the volume size and compacting the VHDX file.
- Multiple defrag passes might be needed.
- If the disk has any issues, it will NOT shrink or compact. Make sure that chkdsk is run.
Shrink the Volume Size
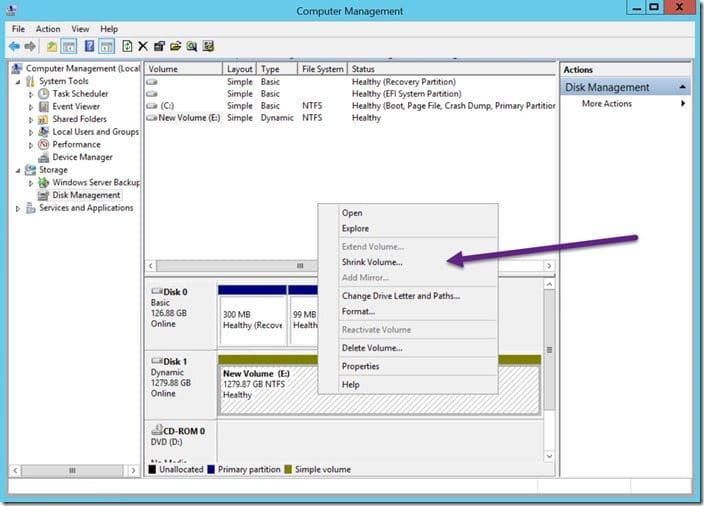
Open Computer Management and select the Disk Management node. Next, select volume (E:), right click on it and select Shrink Volume…

Wait for Computer Management to analyze the volume.
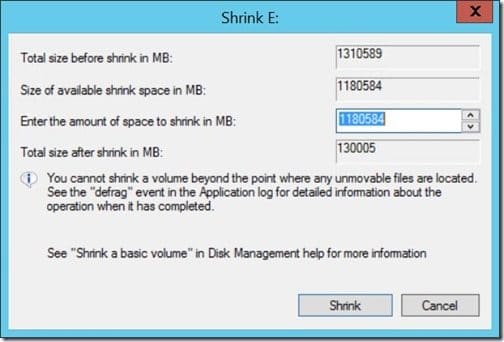
I will select the suggested new size. Click Shrink to continue.
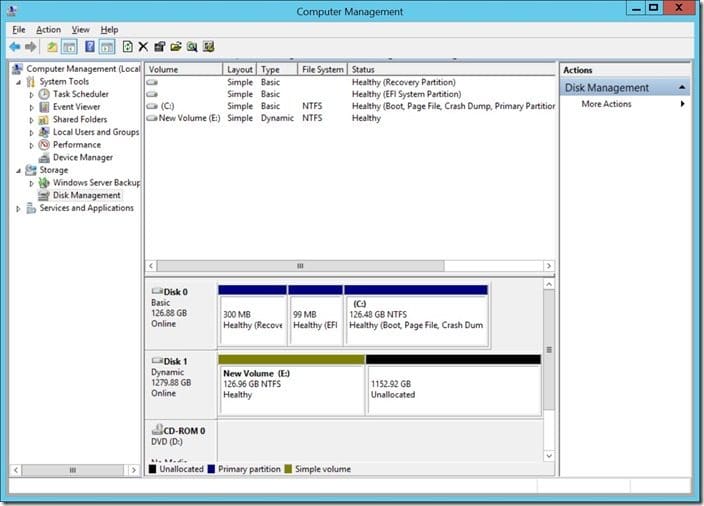
Now my disk is back to 128GB in size. Time to compact the VHDX file. I’ll start by shutting down the VM.
Compact the VHDX File
These next set of steps will reduce/compact the physical size of the VHDX file.
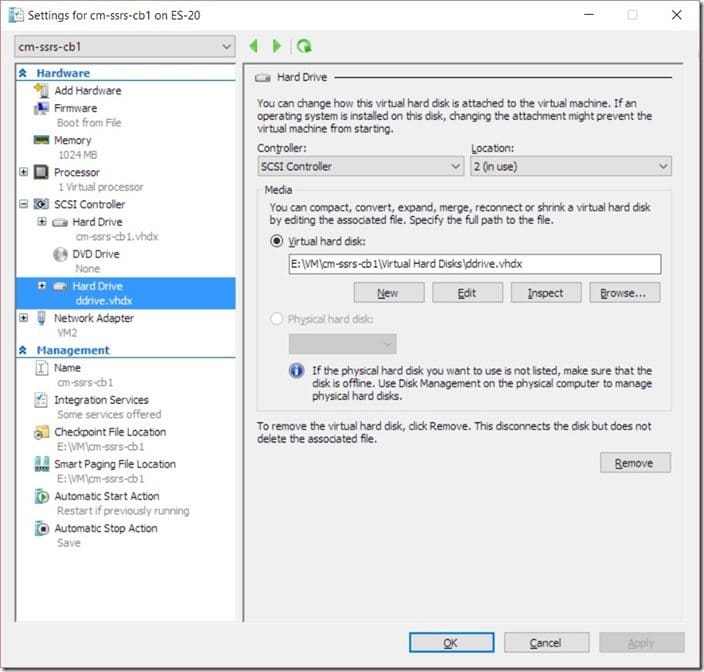
In Hyper-V Manager, bring up the Settings page for the VM. Click on the Edit button.
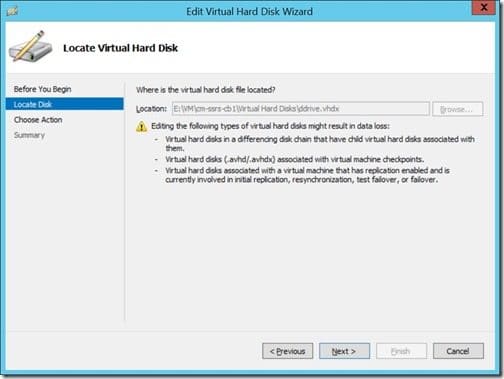
Click Next.
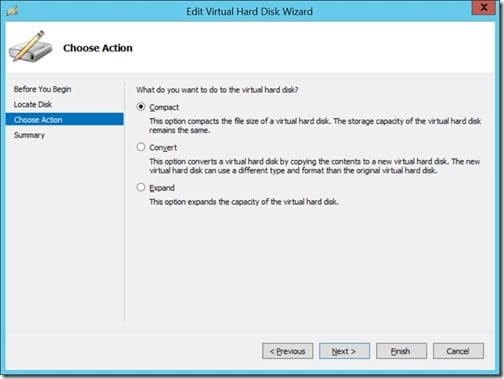
Select Compact and then click Next. This will reduce the phyiscal size, but not the logical size of the VHDX file.
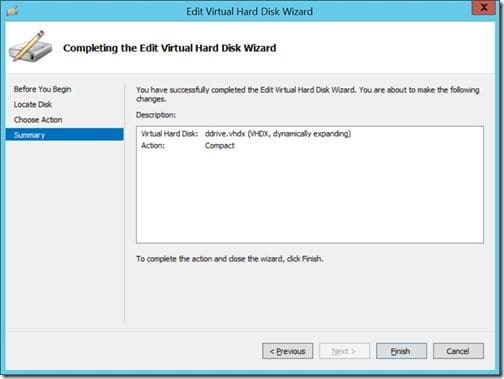
Click Finish.
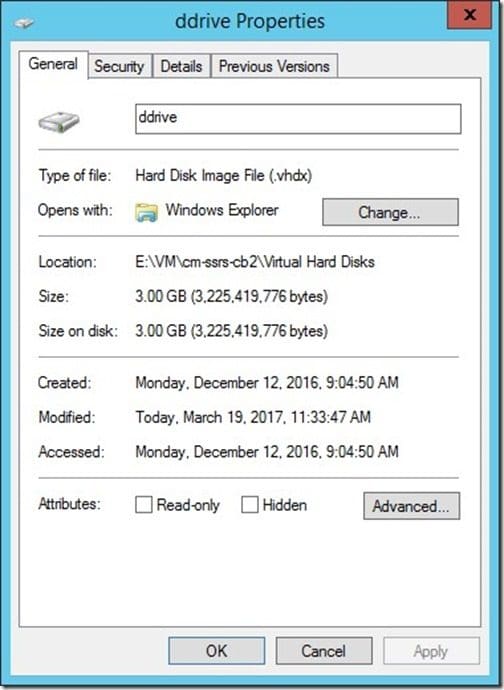
Now if you look at the VHDX’s file size, it was reduced to the bare minimum size of 3GB. Keep in mind that your minimum size may be different.
Shrink the size of a VHD file
These next steps will shrink the logical size of the VHDX file.
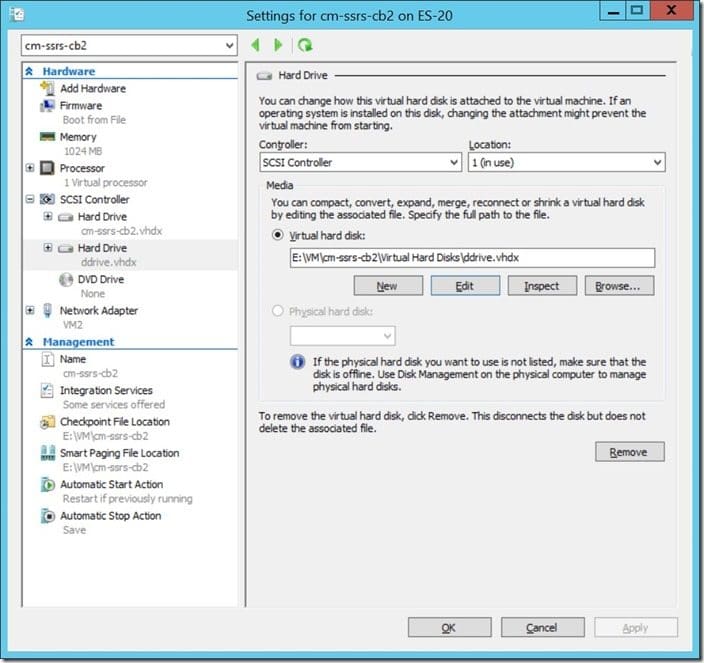
Again, in Hyper-V Manager, bring up the Settings page for the VM. Click on the Edit button.
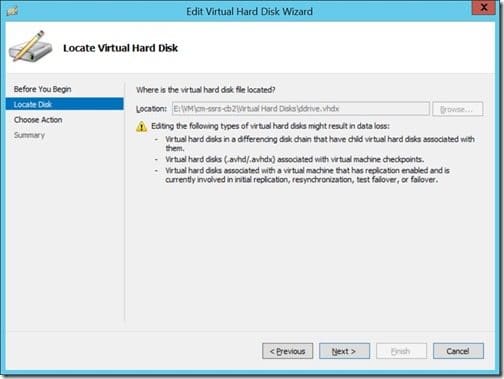
Click Next.
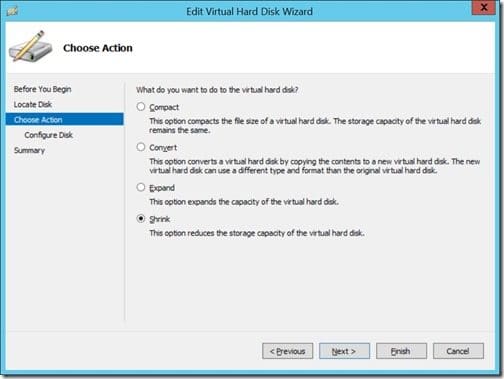
Select Shrink and then click Next.
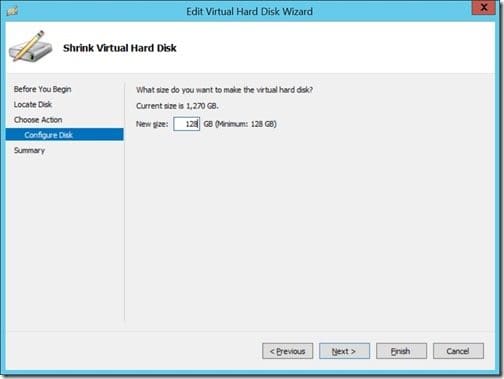
Set the New size to 128GB, and then click on the Finish button.
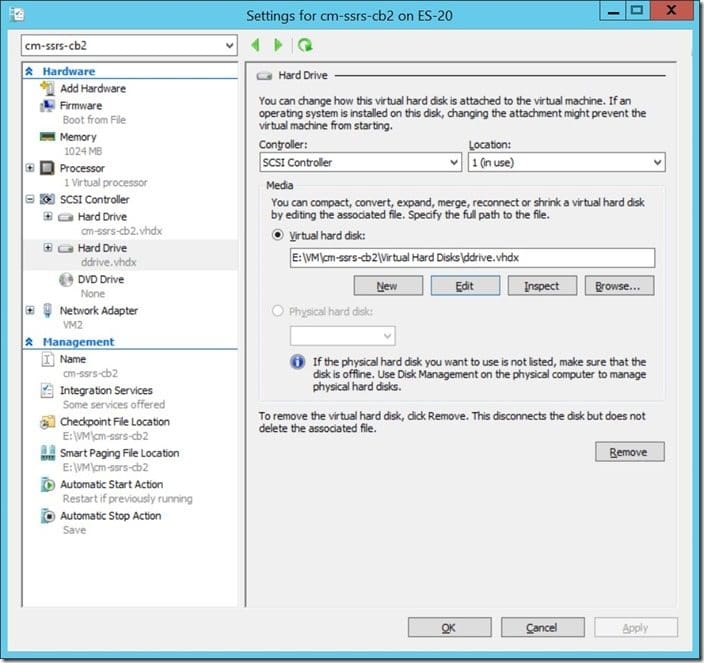
Click OK to close the VM’s Settings window. Now start the VM.
Review Volume Size
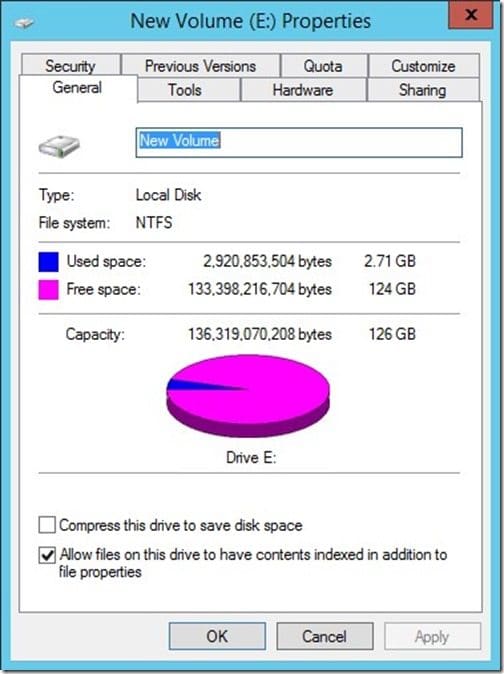
After logging onto the VM, review the disk size. Notice that it is back to its original size.
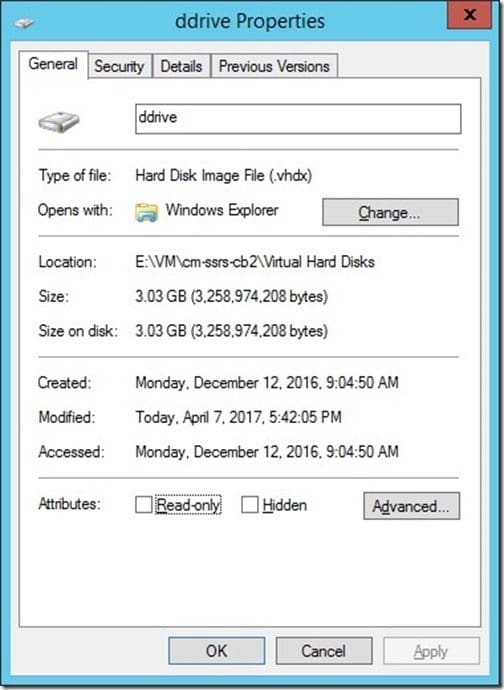
Now look at the physical VHDX file (see screenshot above). It is now 3.03GB in size. When you compare this to the 256GB it was at the beginning of this blog post, that’s a huge size difference. This will help make my backups faster due to the smaller file size!
If you have any questions about how to shrink the size of a VHD file, please feel free to contact me @GarthMJ.
